Clearing Paper Jams
16-Dec-2011
8200755700
Solution
When <OPEN PRINTER COVER>, <OPEN PRINTER COVER/OPEN REAR COVER>, <CHECK DOCUMENT>, <PAPER JAM>, <PAPER JAM/LIFT PANEL TO OPEN>, <FEEDER PAPER JAM/CHECK THE FEEDER>, <DOCUMENT TOO LONG>, or <OUTPUT TRAY FULL/REMOVE PAPER> appears on the display, remove jammed paper from the machine first, then from the paper cassette or multi-purpose tray if necessary. Check the following if you experience repeated paper jams:
- Fan and tap the paper stack on a flat surface before loading it in the machine.
- Check that the paper you are using meets the requirements for use. (See "Paper Handling.")
- Make sure you have removed any scraps of paper from the inside of the machine.
NOTE
- If you tear the paper, remove any torn pieces to avoid further jams.
- If your hands or clothes get dirty from touching the toner, wash them immediately in cold water. Do not use hot water. If you do, the toner may be set permanently.
- Do not force a jammed document or paper out of the machine. Contact Canon Customer Care Center if needed.
When <CHECK DOCUMENT>, <FEEDER PAPER JAM/CHECK THE FEEDER>, or <DOCUMENT TOO LONG> appears on the display, remove a jammed document from the ADF.
1. Open the ADF cover.

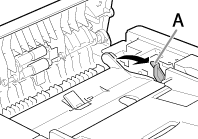
2. Lift the release lever (A) until it clicks into place.
NOTE
When you lift the release lever (A), the inner cover opens.
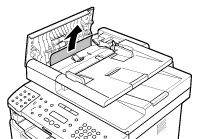
3. Hold both sides of any jammed documents and gently pull them out straight upward.
NOTE
Do not force the jammed document out of the machine. If the jammed document cannot be removed easily, go to the next step.
4. Open the inner cover.

5. Remove the jammed document.

NOTE
Do not force a jammed document out of the machine. If the jammed document cannot be removed easily, go to the next step.
6. Remove the jammed document while lifting the document feeder tray, holding it by its grip (A).

NOTE
Do not force the jammed document out of the machine as it may tear.
7. Return the document feeder tray to the original position.
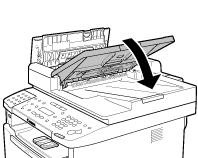
8. Close the inner cover.
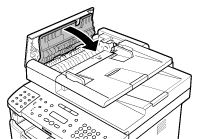
9. Close the ADF cover.

10. Open the ADF and then hold both sides of any jammed documents and gently pull them out.
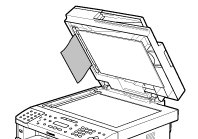
11. Close the ADF.

When <OPEN PRINTER COVER>, <OPEN PRINTER COVER/OPEN REAR COVER>, <CHECK DOCUMENT>, <PAPER JAM>, <PAPER JAM/LIFT PANEL TO OPEN>, <FEEDER PAPER JAM/CHECK THE FEEDER>, <DOCUMENT TOO LONG>, or <OUTPUT TRAY FULL/REMOVE PAPER> appears on the display, remove jammed paper from the machine first, then from the paper cassette or multi-purpose tray if necessary. Check the following if you experience repeated paper jams:
NOTE
If the error message still remains after having removed the jammed paper, open and close the front cover to reset the machine.
 Rear Side of the Machine
When <OPEN PRINTER COVER/OPEN REAR COVER> or <PAPER JAM/LIFT PANEL TO OPEN> appears on the display, remove jammed paper from the rear cover and duplex unit cover.
1. Open the rear cover.

2. Hold both sides of any jammed paper and gently pull it out.
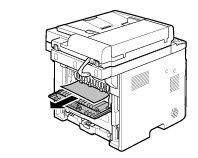
3. Close the rear cover.

4. Open the duplex unit cover.
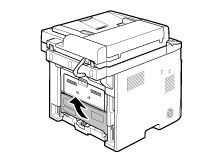
5. Hold both sides of any jammed paper and gently pull it out.

6. Close the duplex unit cover.

7. Open and close the front cover to reset the machine.
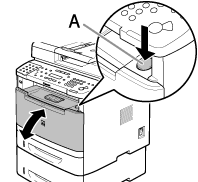
If you are using the multi-purpose tray, close it before opening the front cover. To open the front cover, push the open button (A).

 Front Side of the Machine
When <OPEN PRINTER COVER> or <PAPER JAM/LIFT PANEL TO OPEN> appears on the display, remove jammed paper from the inside of the machine.
1. Push the open button.
If you are using the multi-purpose tray, close it before opening the front cover.
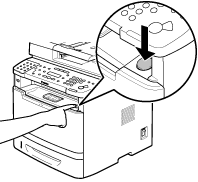
2. Open the front cover.
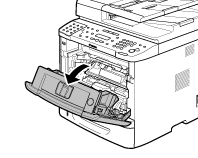
3. Remove the toner cartridge from the machine.

NOTE
- Remove watches and any bracelets or rings when touching the inside of the machine. These items might be damaged if they come into contact with the parts inside of the machine.
- To avoid exposing the toner cartridge to light, place it in its protective bag or wrap it in a thick cloth.
- Do not open the drum protective shutter on the toner cartridge. Print quality may deteriorate if the drum surface is exposed to light or is damaged.
- Always hold the toner cartridge by its handle.
4. Remove the jammed paper from inside of the machine.
- 4-1. Lift the transport guide by its corner tab and hold it.

4-2. Slide and push the jammed paper into the machine until the front edge of jammed paper comes out.
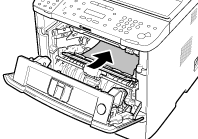
4-3. Remove the jammed paper from the machine.
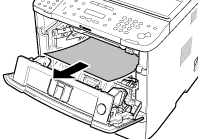
- When the jammed paper was not removed.
 1. Lift the roller cover by its center tab and hold it.
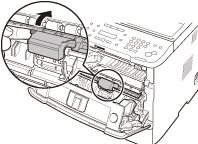
 2. Remove the jammed paper from the machine.
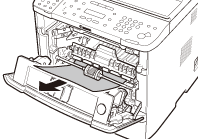
5. Align the toner cartridge to the guides in the machine and slide the cartridge completely into the machine until it stops.

6. Close the front cover.

 Output Tray
When <OUTPUT TRAY FULL/REMOVE PAPER> appears on the display, remove jammed paper from the output tray.
1. Hold the front side of the operation panel with your hands.
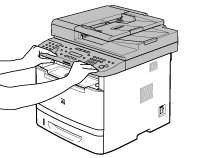
2. Lift the scanning platform (A) until it is locked. (You will hear an audible "click.")
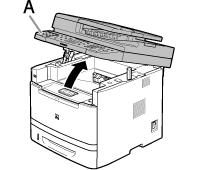
3. Hold both sides of any jammed paper and gently pull it out.

NOTE
- Do not force a jammed paper out of the machine.
- If unfixed toner is on the removed paper, it may adhere to the paper to be printed next.
4. Lower the scanning platform.
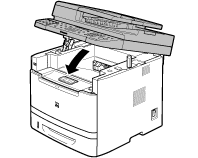
5. Open and close the front cover to reset the machine.
If you are using the multi-purpose tray, close it before opening the front cover. To open the front cover, push the open button (A).

 Multi-Purpose Tray
When <OPEN PRINTER COVER> or <PAPER JAM/LIFT PANEL TO OPEN> appears on the display, remove jammed paper from the multi-purpose tray.
1. Hold both sides of any jammed paper and gently pull it out.

NOTE
Do not force a jammed paper out of the machine.
2. Close the multi-porpose tray.
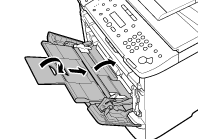
3. Open and close the front cover to reset the machine.
If you are using the multi-purpose tray, close it before opening the front cover. To open the front cover, push the open button (A).

 Paper Cassette
When <OPEN PRINTER COVER> or <PAPER JAM/LIFT PANEL TO OPEN> appears on the display, remove jammed paper from the paper cassette.
1. Pull the paper cassette half way out.

2. Push downward on the jammed paper as you remove it.

NOTE
Do not force a jammed paper out of the machine. Doing so may result in the feed roller coming off.
3. Gently push the paper cassette back into the machine until it clicks into place in the closed position.
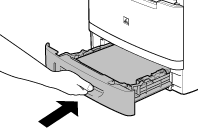
4. Open and close the front cover to reset the machine.
If you are using the multi-purpose tray, close it before opening the front cover. To open the front cover, push the open button (A).

 Optional Paper Cassette
When <OPEN PRINTER COVER> or <PAPER JAM/LIFT PANEL TO OPEN> appears on the display, remove jammed paper from the optional paper cassette.
1. Pull the optional paper cassette half way out.
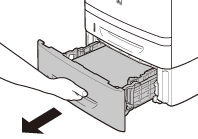
2. Push downward on the jammed paper as you remove it.

NOTE
Do not force a jammed paper out of the machine. Doing so may result in the feed roller coming off.
3. Gently push the optional paper cassette back into the machine until it clicks into place in the closed position.

4. Open and close the front cover to reset the machine.
If you are using the multi-purpose tray, close it before opening the front cover. To open the front cover, push the open button (A).
 Duplex Unit
When <OPEN PRINTER COVER> or <PAPER JAM/LIFT PANEL TO OPEN> appears on the display, remove jammed paper from the duplex unit.
1. Pull out the paper cassette.
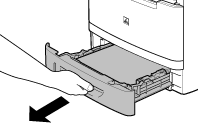
2. Hold the paper cassette with both hands and remove it from the machine.
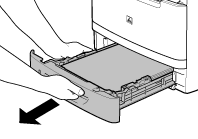
3. Open the duplex print transport guide, holding its tab (A) on the left side inside of the machine.

4. Hold both sides of any jammed paper and gently pull it out.

NOTE
Do not force a jammed paper out of the machine.
5. Close the duplex print transport guide.
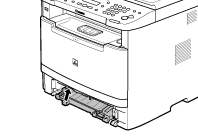
6. Hold the paper cassette with both hands and set it back into the machine.
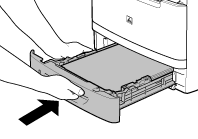
7. Open and close the front cover to reset the machine.
If you are using the multi-purpose tray, close it before opening the front cover. To open the front cover, push the open button (A).
