How to load custom size paper in the paper cassette
05-Jul-2012
8201582300
Issue
The paper cassette can be loaded with up to approximately 250 sheets of plain paper (64 g/m2) of the following custom paper sizes.
- Width 148.0 to 215.9 mm; Length 210.0 to 355.6 mm
IMPORTANT
Operational requirements and restrictions are indicated at the end of this page. Be sure to read these items carefully in order to operate the printer correctly, and to avoid damage to the printer.
Cause and Solution
When the paper source has run out of paper, or the setting for [Register Paper Size in Cassettes] in the Printer Status Window is different from that for [Output Size] in the [Page Setup] sheet in the printer driver, a message appears in the Printer Status Window, and the (Load Paper) indicator (orange) comes on or blinks. In this case, load paper and specify the settings for the paper.
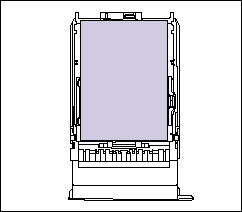
Be sure to load paper in portrait orientation when loading it in the paper cassette.
Cassette 1
Cassette 2
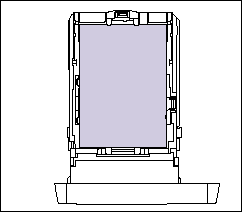
Perform the following procedure to load custom size paper.
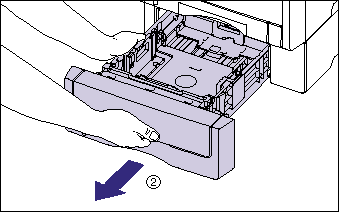
1. Pull out the paper cassette.
Cassette 1
Pull out the paper cassette gently (1) .
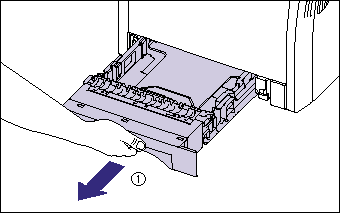
While holding the paper cassette with both hands, remove it from the printer unit as shown in the figure (2) .

Cassette 2
Pull out the paper cassette gently (1) .
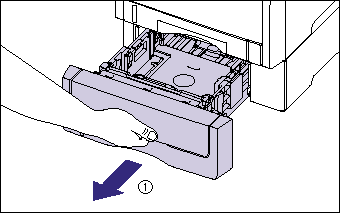
While holding the paper cassette with both hands, remove it from the paper feeder as shown in the figure (2) .
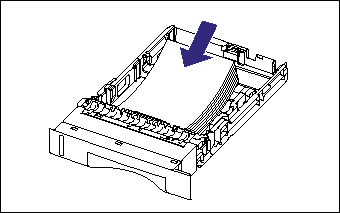
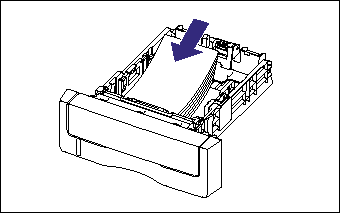
2. Load the paper so that the edge of the paper is aligned with the front side of the paper cassette.
Cassette 1
Cassette 2
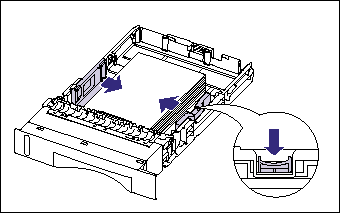
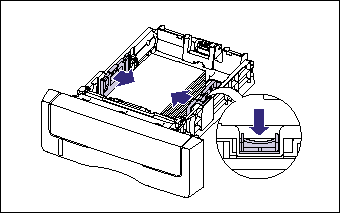
3. While holding the lock release lever of the side paper guides, slide the guides to the mark for the size of the loaded paper.
The side paper guides move together.
Cassette 1
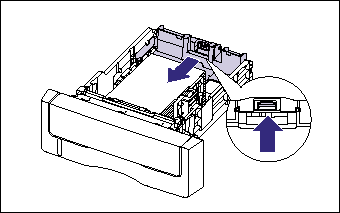
Cassette 2
4. While holding the lock release lever of the rear paper guide, slide the guide to the size mark for the loaded paper.
Cassette 1
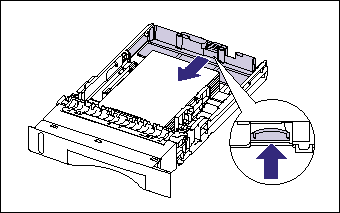
Cassette 2
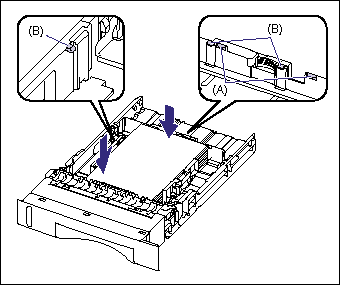
5. Hold down the paper as shown in the figure, make sure that the paper stack does not exceed the load limit marks (A), and then set it under the hooks (B) on the paper guides.
Make sure that there is sufficient space between the hooks of the paper guides and the paper stack. If there is no sufficient space, slightly reduce the amount of paper.
Cassette 1
 .
.Cassette 2

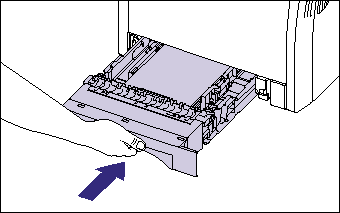
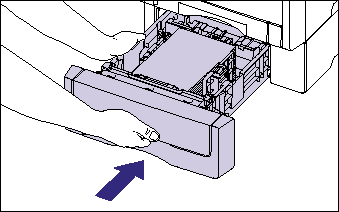
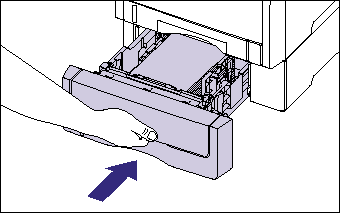
6. Set the paper cassette in the printer.
Push the paper cassette into the printer firmly until the front side of the cassette is flush with the front surface of the printer.
Cassette 1

Cassette 2
7. Register the size of the loaded paper using the following procedure.
This printer's paper cassette cannot automatically detect the paper size.
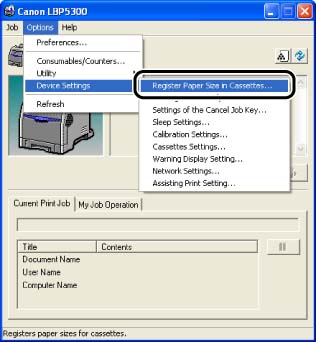
Therefore, you need to register the size of the loaded paper in the Printer Status Window.
8. Display the Printer Status Window.
For details on methods for displaying the Printer Status Window, see "Displaying the Printer Status Window" in Related Information at the end of this page.
9. From the [Options] menu, select [Device Settings] -> [Register Paper Size in Cassettes].
10. Select [Custom], then click [OK].
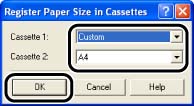
11. When loading custom size paper, register the size of the loaded custom size paper using the following procedure.
When printing custom size paper, you need to register the custom paper size in the printer driver previously.
12. Display the [Page Setup] sheet, then click [Custom Paper Size].

13. Specify the following options as needed.
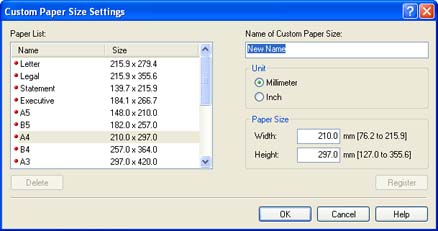
- [Paper List] :
Displays [Name] and [Size] of standard paper sizes and added custom paper sizes.
- [Name of Custom Paper Size] :
You can enter the name of the custom paper size to be added. Up to 31 characters can be entered.
- [Unit] :
Specify the unit ([Millimeter] or [Inch]) to be used when setting the custom paper size.
- [Paper Size] :
Specify the height and width of the custom paper size ([Height] [Width]). Specify the custom paper size in portrait orientation ([Height] [Width]) within user-definable sizes.
14. Click [Register].
15. Confirm the settings, then click [OK].
If you want to print after loading paper in the paper source, you need to configure the printer driver. For details on the procedure for configuring the printer driver, see "How to configure the printer driver and print" in Related Information at the end of this page.
IMPORTANT
a. For more details on the usable paper, see "Usable paper" in Related Information at the end of this page.
b. For details on handling the paper cassette, see "Precautions for handling the multi-purpose tray or paper cassette" in Related Information at the end of this page.
c. Do not load any media other than plain paper (60 - 105 g/m2) in the paper cassette. This may result in paper jams or damage to the printer.
d. When [Paper Source] in the [Paper Source] sheet is set to [Cassette 1] or [Cassette 2], and the [Detect Paper Size] check box in the [Finishing Details] dialog box in the printer driver is not selected, the printer does not check the paper size.
When the [Detect Paper Size] check box is selected (default setting), and the size of the paper loaded in the paper cassette and the specified settings are different from each other as shown in the following examples, a message appears.
When the message appears, and paper of the size specified in [Output Size] is to be printed, load the appropriate paper in the paper cassette again, and then specify the appropriate paper size in the [Register Paper Size in Cassettes] dialog box.
When printing the currently loaded paper, click the [Resolve Error] button.
If [Paper Source] is set to [Auto], the printer checks the paper size regardless of the setting for [Detect Paper Size].
e. If you use paper that has been poorly cut, multiple sheets of paper may be fed at once. In this case, fan the paper thoroughly, and then align the edges of the stack on a hard, flat surface.
f. Be sure to align the paper guides with the width of the paper. If the paper guides are too loose or too tight, this may result in misfeeds or paper jams.
g. The paper capacity of Cassette 1 is approximately 250 sheets of plain paper (64 g/m2), and that of Cassette 2 is approximately 500 sheets of plain paper (64 g/m2). Be sure that the paper stack does not exceed the load limit marks on the paper guides. If the paper stack exceeds the load limit marks, this may result in misfeeds.
NOTE
a. To print letterhead paper or paper printed with a logo, load the paper so that the printing side is facing up, as shown in the following figure.
(  :Feeding direction)
 :Feeding direction)
 Cassette 1
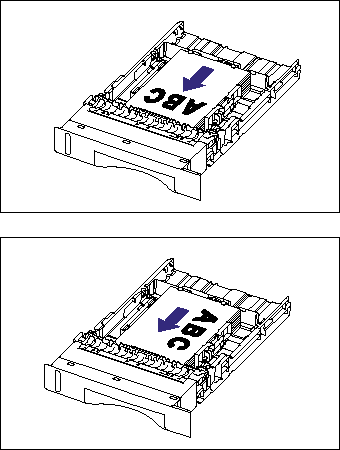
Cassette 2
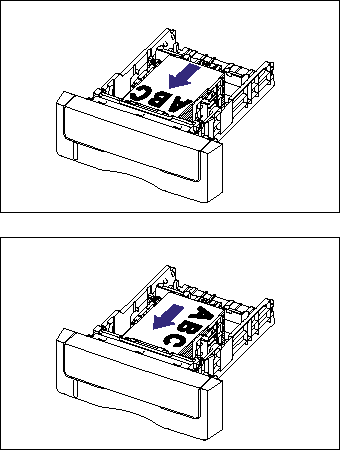
b. To specify a custom paper size, display the following dialog box.
- For Windows 2000/XP/Server 2003
Display the [Document Properties] dialog box from the [Printers and Faxes] folder (the [Printers] folder for Windows 2000).
- For Windows 98/Me
Display the [Printer Properties] dialog box from the [Printers] folder.
c. On Windows 98/Me, up to 30 custom paper sizes can be added. On Windows 2000/XP/Server 2003, the number depends on the system environment.