How to import images to Digital Photo Professional Express (Wi-Fi Connection) (EOS 90D)
27-Aug-2019
8204582400
Solution
When the camera and iPad are connected via Wi-Fi, the images on the camera can be imported to the iPad and displayed in Photo Professional Express. The two ways to import images are as follows.
- Use Digital Photo Professional Express to import JPEG images/RAW (CR3) images
- Use Camera Connect to import JPEG images/RAW (CR3) images
IMPORTANT
- It is recommended to save the images imported to Digital Photo Professional Express to a memory card or another location other than the iPad, should there be a need to use the images outside of Digital Photo Professional Express.
- Before connecting the camera, you must install the free Camera Connect app to the iPad, which can be downloaded from the App Store.
- Use Camera Connect version 2.5.10 or over.
- See "Related Information" for details on what iPad can be connected to the camera via Wi-Fi.
- Interface or functions of Digital Photo Professional Express or Camera Connect are subject to change, for application improvements or update. In such a case, features may differ from sample screens or operation instructions in this explanation.
NOTE
- Procedures starting with an
 illustration, are steps for the iPad. Pocedures starting with a
  illustration, are steps for the camera.
 - Keep your fingers or other objects off the Wi-Fi antenna area. Covering this may decrease the speed of your image transfers.
- Depending on the condition of the network you are using, it may take a longer time to transfer images.
- A memory card must be in the camera for the connection.
 1. Install Camera Connect.
 2. Open [ Settings ] on iPad, make sure the [ Airplane Mode ] is [ OFF ].
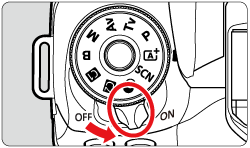
 3. Set the camera's power switch to <ON>.
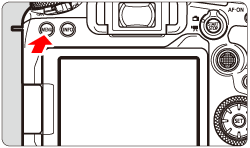
 4. Press the <
  > button.
 5. Press the <
  > button to select the [
  ] tab.
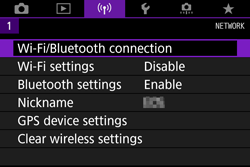

 6. Turn the <
  > dial to select [ Wi-Fi settings ], and press <
  >.
>.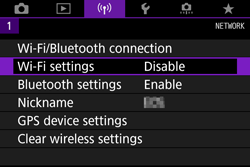

 7. Turn the <
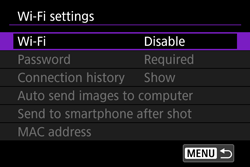
  > dial to select [ Wi-Fi ], and press <
  >.
>.
 8. Turn the <
  > dial to select [ Enable ], and press <
  >.
>.
 9. Press the <
  > button.
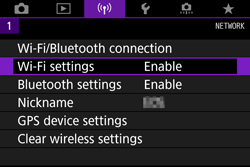
 10. Turn the <
  > dial to select [ Wi-Fi/Bluetooth connection ], and press <
  >.
>.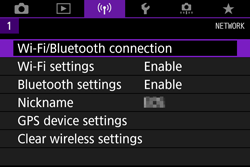
- The screen to select a device for connection is displayed.
 11. Turn the <
  > dial to select [
  Connect to smartphone ], and press <
  >.
>.
NOTE
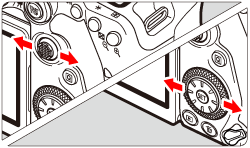
- If the history is displayed, switch the screen with the <
 > <
> <  > keys.

 12. Turn the <
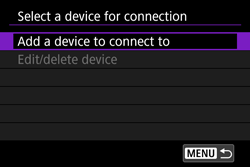
  > dial to select [ Add a device to connect to ], and press <
  >.
>.
 13. Turn the <
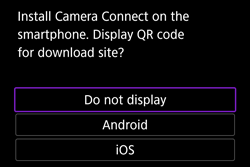
  > dial to select [ Do not display ], and press <
  >.
>.
 14. Turn the <
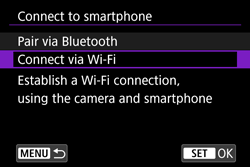
  > dial to select [ Connect via Wi-Fi ], and press <
  >.
>.
 15. Check the SSID (network name) (
  ) and password (
  ).
).
 16. Open [ Settings ] on the iPad, select [ Wi-Fi ] to confirm the SSID is the same as the one displayed on the camera screen, and tap to select.
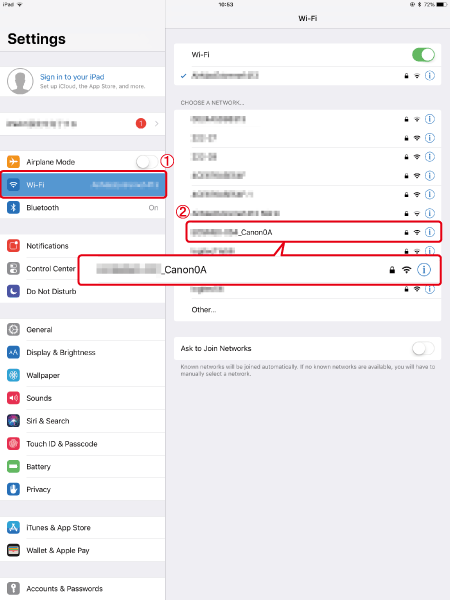
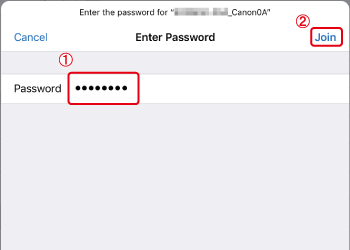
 17. Input the same Password as displayed on the camera (
  ) and tap [ Join ] (
  ).
).
 18. Open Digital Photo Professional Express.
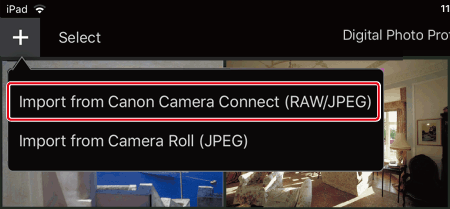
 19. Tap [Import from Canon Camera Connect (RAW/JPEG)] from [
  ] on the upper left hand.
NOTE
- If Camera Connect is not installed, the App Store page will be displayed. In order to connect the camera to the iPad using Wi-Fi, the connection must be made through Camera Connect. Please install Camera Connect first.
- Press the [OK] button when the screen below is displayed.
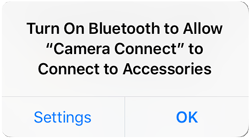
 20. Tap [ OK ].
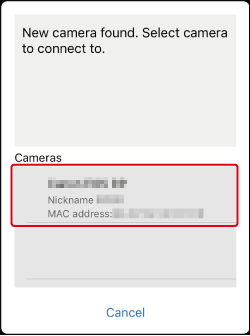
 21. Tap the camera to connect.
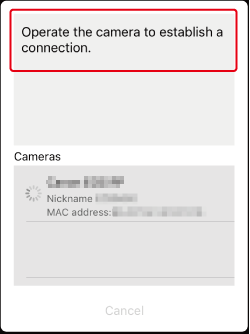
 22. Confirm that [ Operate the camera to establish a connection ] is displayed.
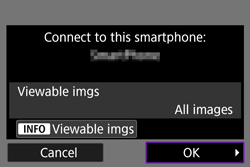
 23. Choose [ OK ] and press <
  >.
>.
- [
 Wi-Fi on ] will be displayed on the camera screen.
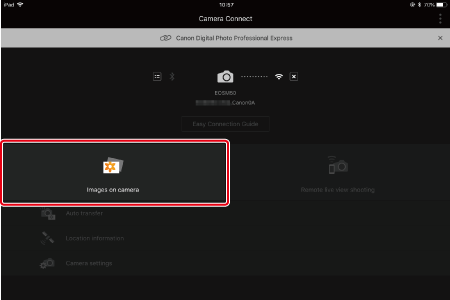
 24. Tap [ Images on camera ].
 25. Tap [ Select ].
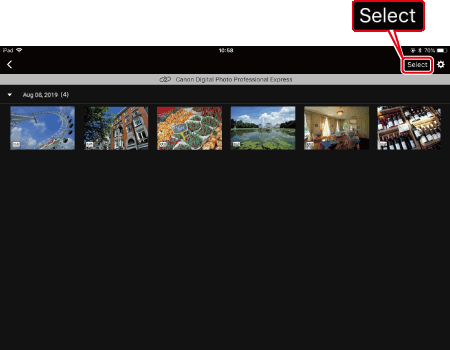
 26. Tap on the imported images to select images.
 - Selected images will have a
 displayed (
 ).
). - Tap on [
 ] to select all.
 - After selecting, tap on
 (
( ).
).
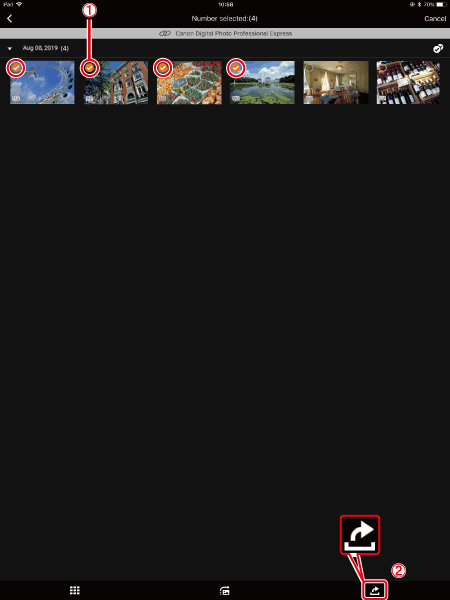
 27. Select image size, and tap [ OK ].
 28. The selected images will be imported into Digital Photo Professional Express.
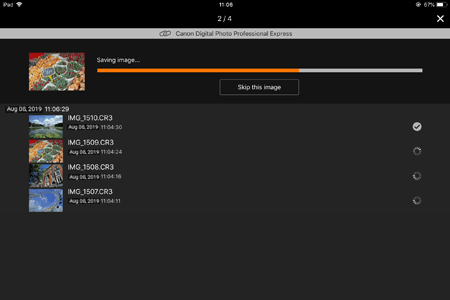
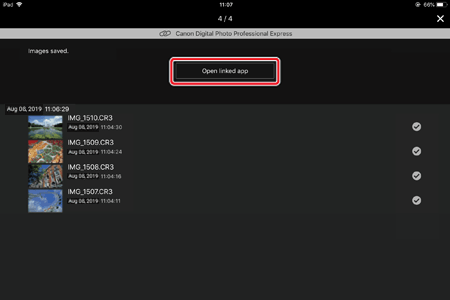
 29. Once the images have been imported, tap [ Open linked app ].
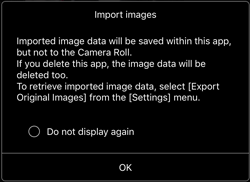
 30. Tap [ Yes ].
 31. Digital Photo Professional Express will open, tap [ OK ].
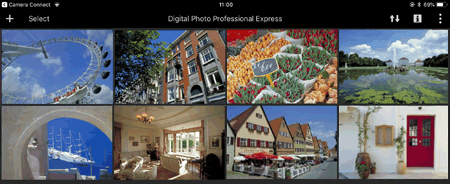
 32. The imported images will be displayed in the thumbnails screen in Digital Photo Professional Express.
 1. Install Camera Connect.
 2. Open [ Settings ] on iPad, make sure the [ Airplane Mode ] is [ OFF ].
 3. Set the camera's power switch to <ON>.
 4. Press the <
  > button.
 5. Press the <
  > button to select the [
  ] tab.

 6. Turn the <
  > dial to select [ Wi-Fi settings ], and press <
  >.
>.

 7. Turn the <
  > dial to select [ Wi-Fi ], and press <
  >.
>.
 8. Turn the <
  > dial to select [ Enable ], and press <
  >.
>.
 9. Press the <
  > button.
 10. Turn the <
  > dial to select [ Wi-Fi/Bluetooth connection ], and press <
  >.
>.
- The screen to select a device for connection is displayed.
 11. Turn the <
  > dial to select [
  Connect to smartphone ], and press <
  >.
>.
NOTE
- If the history is displayed, switch the screen with the <
 > <
> <  > keys.


 12. Turn the <
  > dial to select [ Add a device to connect to ], and press <
  >.
>.
 13. Turn the <
  > dial to select [ Do not display ], and press <
  >.
>.
 14. Turn the <
  > dial to select [ Connect via Wi-Fi ], and press <
  >.
>.
 15. Check the SSID (network name) (
  ) and password (
  ).
).
 16. Open [ Settings ] on the iPad, select [ Wi-Fi ] to confirm the SSID is the same as the one displayed on the camera screen, and tap to select.
 17. Input the same Password as displayed on the camera (
  ) and tap [ Join ] (
  ).
).
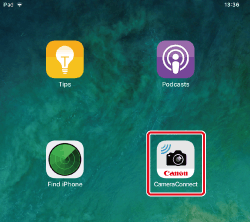
 18. Go to home screen, and open Camera Connect.
NOTE
Press the [OK] button when the screen below is displayed.

 19. Tap the camera to connect.
 20. Confirm that [ Operate the camera to establish a connection ] is displayed.
 21. Select [ OK ] and press <
  >.
>.
- [
 Wi-Fi on ] will be displayed on the camera screen.
 22. Tap [ Images on camera ] .
 23. Tap [ Select ].
 24. Tap on the imported images to select images.
 - Selected images will have a
 displayed (
  ).
). - Tap on [
 ] to select all.
 - After selecting, tap
 (
( ).
).

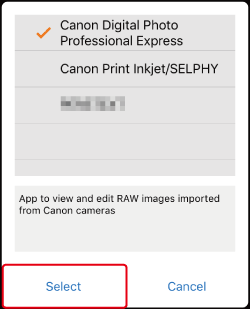
 25. Tap [Digital Photo Professional Express], to choose and tap [ Select ].
 26. Select image size, and tap [ OK ].
 27. The selected images will be imported into Digital Photo Professional Express.
 28. Once the images have been imported, tap [ Open linked app ].
 29. Tap [ Yes ].
 30. Digital Photo Professional Express will open, tap [ OK ].
 31. The imported images will be displayed in the thumbnails screen in Digital Photo Professional Express.
Use the virtual keyboard operation to enter information. Note that the length and type of information you can enter varies depending on the function you are using.
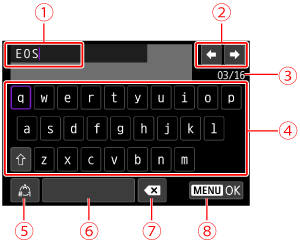
 | Input area, for entering text |  | Switch input modes |
 | Cursor keys, for moving in the input area |  | Space |
 | Current no. of characters/no. available |  | Delete a character in the input area |
 | Keyboard |  | Finish the text entry |
NOTE
- Use <
 > <
> <  > to move within
  and
and  -
-  .
. - Press <
 > to confirm input or when switching input modes.