Making Index Prints
Making Index Prints
|
Notes
|
||
|
|
-
|
In order to perform this operation, it is necessary to install [ZoomBrowser EX] from the CD-ROM (Solution Disk) supplied with the product.
|
|
|
-
|
Operations for Windows Vista are explained here. Images displayed or operation might differ slightly in Windows XP and Windows 2000.
|
1. Double-click the [ZoomBrowser EX] shortcut icon on your desktop to start [ZoomBrowser EX].

If you cannot find the [ZoomBrowser EX] shortcut icon on your desktop, click [Start] ( ) → [All Programs] or [Programs] → [Canon Utilities] → [ZoomBrowser EX] and select [ZoomBrowser EX] to start ZoomBrowser EX.
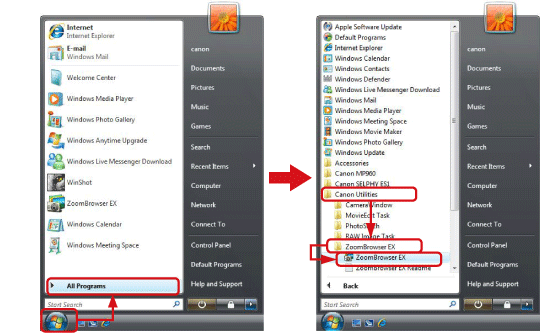
2. The following screen appears.
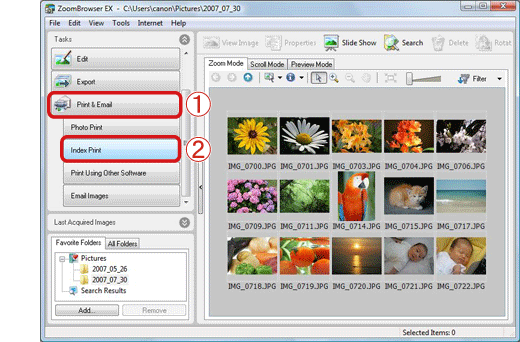
3. The following screen appears.
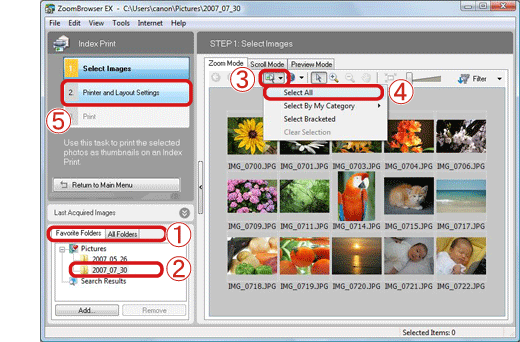
Images exported to ZoomBrowser EX are usually saved in [Pictures] or [My Pictures] folder.
If you wish to select individual images for index printing, click the images while holding the [Ctrl] key on the keyboard.
4. The following screen appears.
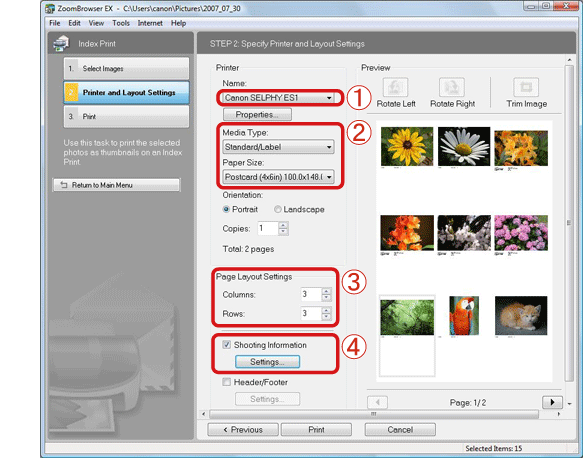
If you clear the [Shooting Information] checkbox (
Click the necessary items ( ) on the following screen to set the shooting information.
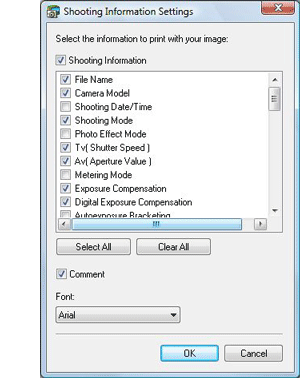
5. The screen reverts to the screen shown below.

This completes the process of making index prints.


