
Export Still Images after Changing their Size
Export Still Images after Changing their Size
|
Notes
|
||
|
|
-
|
In order to perform this operation, it is necessary to install [ZoomBrowser EX] from the CD-ROM (Solution Disk) supplied with the product.
|
|
|
-
|
Operations for Windows Vista are explained here. Images displayed or operation might differ slightly in Windows XP and Windows 2000.
|
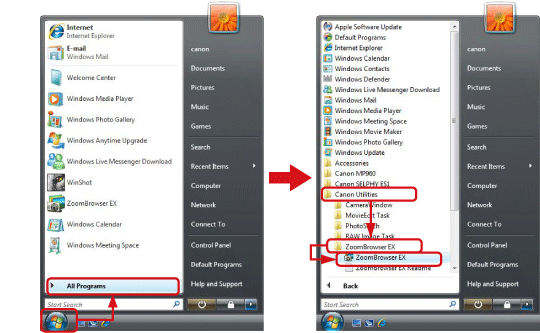
1. Double-click the [ZoomBrowser EX] shortcut icon on your desktop to start [ZoomBrowser EX].

If you cannot find the [ZoomBrowser EX] shortcut icon on your desktop, click [Start] ( ) → [All Programs] or [Programs] → [Canon Utilities] → [ZoomBrowser EX] and select [ZoomBrowser EX] to start ZoomBrowser EX.
2. The following screen appears.

3. The following screen appears.
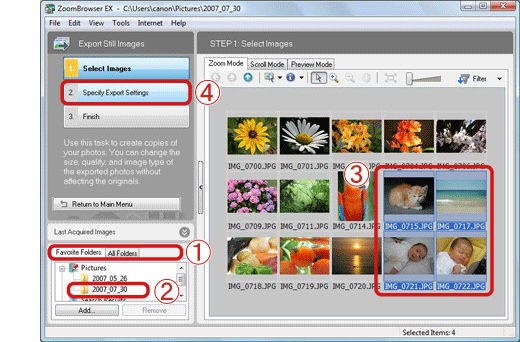
Images exported to ZoomBrowser EX are usually saved in the [Pictures] or [My Pictures] folder.
4. The following screen appears.
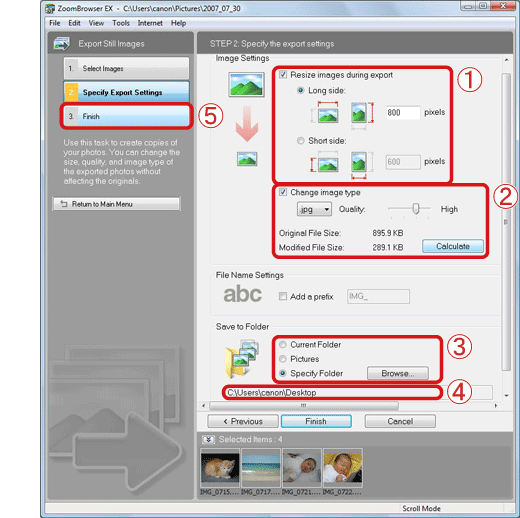
If you select [Desktop] for the location where images will be saved, there are cases in which the files will not be displayed even after exporting is completed. If so, press the <F5> key on the keyboard and try updating the desktop.
This completes the process of exporting still images and changing their size.