Solution
Canceling a Print Job Using the Print Queue
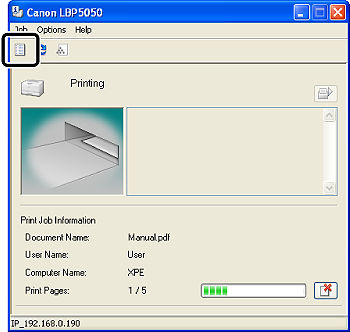
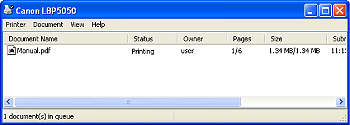
1. Display the Printer Status Window.
2. Click [

] (Print Queue).
The print queue is displayed.
NOTE
- You can also display the print queue using the following procedure.
1. Display the [Printers and Faxes] folder or the [Printers] folder.
From the [Start] menu, select [Settings] > [Printers].
From the [Start] menu, select [Printers and Faxes].
From the [Start] menu, select [Control Panel], and then click [Printers and Other Hardware] > [Printers and Faxes].
From the [Start] menu, select [Control Panel], and then click [Printer].
2. Double-click the icon for this printer.
- For details on the print queue, see Windows Help.
3. Right-click the job that you want to cancel, then select [Cancel] from the pop-up menu.
NOTE
- Another user's job is not displayed. However, all the jobs are displayed on the print server if the printer is shared on a network.
When you cannot print because an error is occurring with another user's job (when you cannot delete another user's job on your computer), use the

(Cancel Job) key to cancel the job.
- This printer allows you to operate jobs in the print queue until they are completed.
4. Clicking [Yes] cancels the print job.
Canceling a Print Job Using the Printer Status Window
1. Display the Printer Status Window.
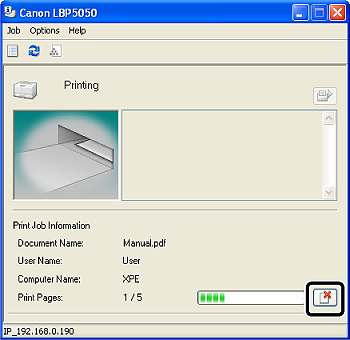
2. Clicking [

] (Cancel Job) cancels the print job.
NOTE
While another user's job is being printed, you cannot cancel the job. However, you can cancel the print job from the print server if the printer is shared on a network.
When you cannot print because an error is occurring with another user's job (when you cannot delete another user's job on your computer), use the

(Cancel Job) key to cancel the job.
Canceling a Print Job Using the Cancel Job Key
When you cannot print because an error is occurring with another user's job (when you cannot delete another user's job on your computer), use the

(Cancel Job) key to cancel the job.
1. Pressing the

(Cancel Job) key cancels the job.
The job cancel process starts after you release the key.
NOTE
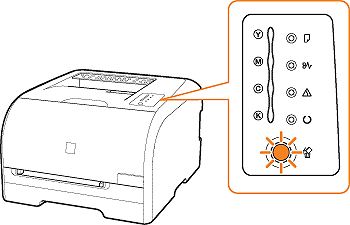
- The
 (Cancel Job) indicator (orange) indicates the following statuses.
- On: The key is being pressed.
- Blinking: The job cancel process is being performed.
- You cannot cancel the following pages or jobs.
- Pages of which data has been received already
- Jobs of which print copy is one sheet of paper
- If the job when the key is pressed and the job when the key is released are different (If the job is switched while the key is being pressed)
- Depending on the settings for the [Settings of the Cancel Job Key] dialog box in the Printer Status Window, you may not be able to cancel a job.
Canceling a Print Job Using the Remote UI (Only for LBP5050N)
If you are using the printer in a network environment, you can cancel a print job using the Remote UI (the software that allows you to manage the printer using a web browser).
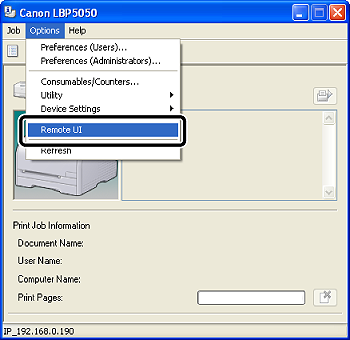
1. Start the Remote UI.
1-1. Display the Printer Status Window.
1-2. From the [Options] menu, select [Remote UI].
NOTE
You can also start the Remote UI by entering the IP address of the printer in a web browser.
For details on starting the Remote UI by entering the IP address of the printer in a web browser, see "User's Guide" (HTML manual) in the CD-ROM supplied with the printer.
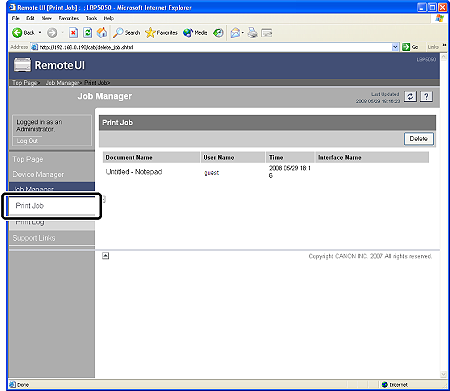
2. From the [Job Manager] menu, select [Print Job].
NOTE
- A job file name of up to 20 characters can be displayed in [Document Name]. If the number of characters exceeds 20, the characters after the limited number are not displayed, or some characters are not displayed properly. Also, depending on the application, the application name may be added to the beginning of the file name.
- If you print via USB, [Local] is displayed in [Interface Name]. If you print via the network, nothing is displayed in the field.
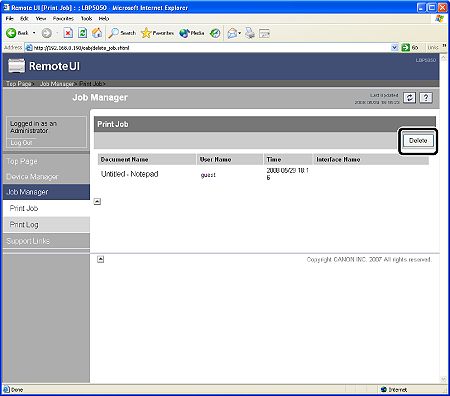
3. Clicking [Delete] cancels the print job.
NOTE
The pages in process of printing when [Delete] is clicked will be printed.
 ] (Print Queue).


 (Cancel Job) key to cancel the job.
 ] (Cancel Job) cancels the print job.
 (Cancel Job) key to cancel the job.
 (Cancel Job) key to cancel the job.
 (Cancel Job) key cancels the job.
 (Cancel Job) indicator (orange) indicates the following statuses.