13-May-2008
8200131600
 , and then press the <FUNC./SET> button
  to specify the item.
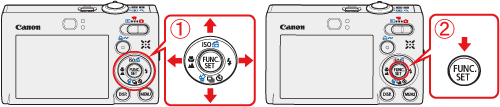
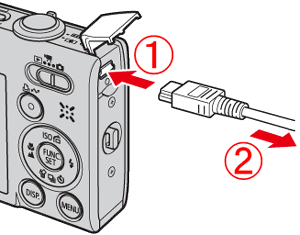 Connect the interface cable to the camera's DIGITAL terminal. Connect the other end of the cable to printer's USB terminal.
 ), and then turn the camera's power switch on.
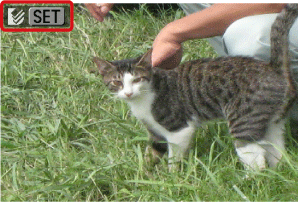
 ) button.
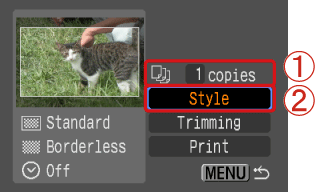 Specify the number of prints. Select [Style], and then press the camera's <FUNC./SET> () button.
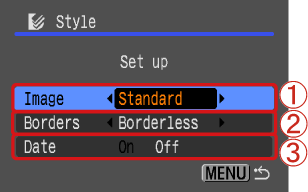 Specify the print layouts. Specify the border settings. Select [Borders] to add borders to the print.
 Specify the date settings. Select [On] to add dates to the print.
 ) button after specifying the settings.
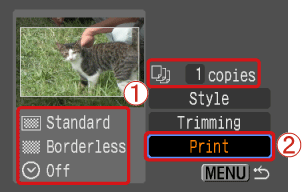 Check the specified items. Select [Print], and then press the <FUNC./SET> () button to start printing.