Solution
If printed ruled lines are misaligned or print results are not even, adjust the print head position.
You need to prepare: a sheet of A4 or Letter-sized plain paper
1. Make sure that the power is turned on and a sheet of A4 or Letter-sized plain paper are loaded in the Rear Tray.Set the Paper Thickness Lever to the left.
2. Open the printer properties dialog box.
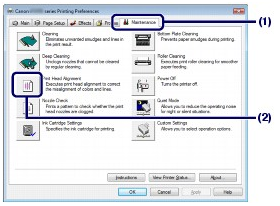
3. Print the print head alignment pattern.
(1) Click the Maintenance tab.
(2) Click Print Head Alignment.
(3) Confirm the displayed message, and click OK.
The print head alignment pattern will be printed. Do not open the Front Cover while printing is in progress. Printing takes about 3 minutes to complete.
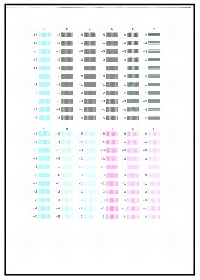
(4) After the pattern below is printed, make sure that the pattern is printed properly, and click Yes.
4. Adjust the print head position.
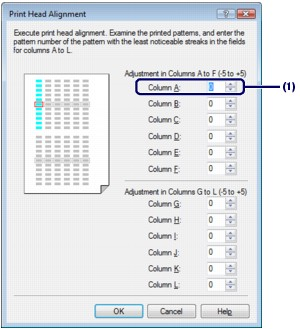
(1) Look at the printout and select the pattern number in column A that has the least noticeable streaks.
NOTE
If it is difficult to pick the best pattern, pick the setting that produces the least noticeable white streaks.
(A) Less noticeable vertical white streaks
(B) Noticeable vertical white streaks
(C) Less noticeable horizontal white streaks
(D) Noticeable horizontal white streaks
(2) Repeat the procedure until you finish selecting the pattern number for column L, and click OK.
(3) Confirm the displayed message, and click OK.
1. Make sure that the power is turned on and a sheet of A4 or Letter-sized plain paper are loaded in the Rear Tray.Set the Paper Thickness Lever to the left.
2. Open the Canon IJ Printer Utility dialog box.
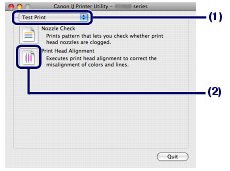
3. Print the print head alignment pattern.
(1) Select Test Print in the pop-up menu.
(2) Click Print Head Alignment.
(3) Confirm the displayed message, and click OK.
The print head alignment pattern will be printed. Do not open the Front Cover while printing is in progress. Printing takes about 3 minutes to complete.
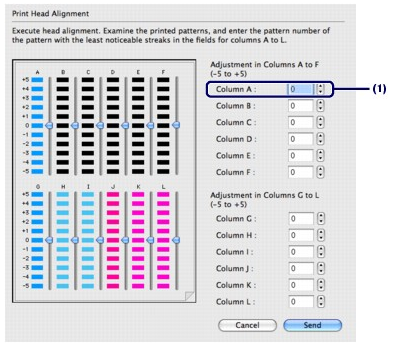
4. Adjust the print head position.
(1) Look at the printout and select the pattern number in column A that has the least noticeable streaks.
NOTE
If it is difficult to pick the best pattern, pick the setting that produces the least noticeable white streaks.
(A) Less noticeable vertical white streaks
(B) Noticeable vertical white streaks
(C) Less noticeable horizontal white streaks
(D) Noticeable horizontal white streaks
(2) Repeat the procedure until you finish selecting the pattern number for column L, and, click Send.
