Solution
These instructions explain how to insert the date in images.
CAUTION
- The [Date Stamp] cannot be deleted from the image data once it has been recorded because the date is written in as an image.
- When selecting [Date Stamp] , [Recording Pixels] is set to 1600 x 1200 pixels and the compression (image quality) to [Fine].
- When the shooting mode is set to <Movie> (
 ), settings for inserting the date and time cannot be made.
- The following explanations are provided based on the assumption that the [Shooting Mode] is set to <Program AE> (
 ).
).
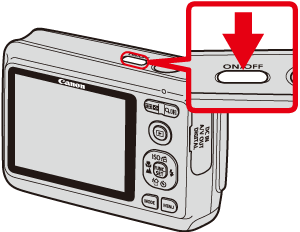
1. Press the <Power> button on the camera.
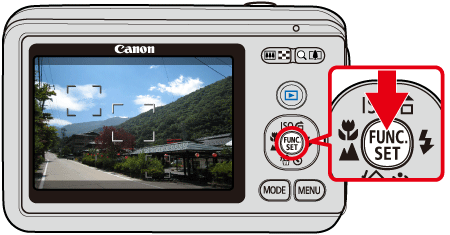
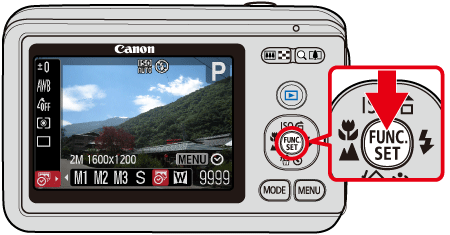
2. Press the <FUNC./SET> (

) button.
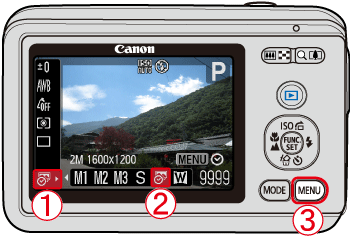
3. A screen like the one below will appear on the monitor.
Select

[Date Stamp] (

) in the [Recording Pixels] section

.

Press the <MENU> (

) button.
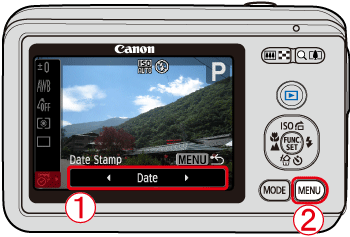
4. A screen like the one below will appear on the monitor.

Operate the <directional buttons> left or right to select [Date Stamp] and set it to [Date] or [Date & Time].

Press the <MENU> (

) button.
5. Press the <FUNC./SET> (

) button.
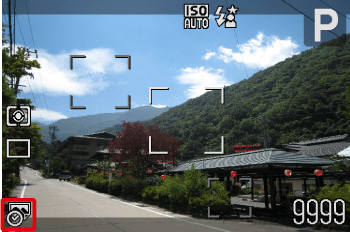
6. Make sure that the [Date Stamp] is set and the following screen will appear with the icon (

) in the lower-left corner of the screen.
7. When shooting with this setting, the date will be embedded in the image as shown below.

[Date]

[Date & Time]
WARNING
The date, its font and color, and the position where it is displayed cannot be changed. Also, dates and times recorded with [Date Stamp] cannot be deleted.
 ), settings for inserting the date and time cannot be made.
 ).
).
 ) button.
 [Date Stamp] (
 ) in the [Recording Pixels] section
  .
. Press the <MENU> (
 ) button.
 Operate the <directional buttons> left or right to select [Date Stamp] and set it to [Date] or [Date & Time].
 Press the <MENU> (
 ) button.
 ) button.
 ) in the lower-left corner of the screen.

 [Date]
 [Date & Time]