Solution
CAUTION
- The information provided here uses [Mac OS X (version 10.4)] and [ImageBrowser version 6.5] as examples. Depending on your Mac OS X or software version, the screen indications and operation procedures may differ slightly.
- In order to perform this operation, it is necessary to install [ImageBrowser] from the CD-ROM (DIGITAL CAMERA Solution Disk) supplied with the product.
- In this section, [PowerShot A3100 IS] is used as an example to explain the operations. Depending on your model, the position of buttons, screen indications, and setting items may vary.
- This section provides step-by-step procedures for transferring newly captured images from the camera to a computer.
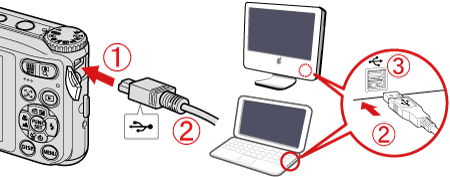
1. Connect the camera's digital terminal and the Macintosh's USB terminal with the supplied [interface cable].

DIGITAL terminal on the camera

[Interface cable]

Macintosh's USB terminal
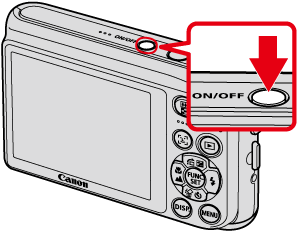
2. Press the <Power> button on the camera.
3. The following window appears.
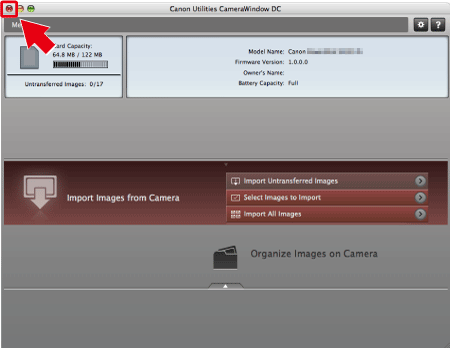
4. The [CameraWindow] menu appears.

Click [Import Images from Camera].
Transferred images are saved to the [Pictures] folder by default.
If you want to change the folder to save transferred images, click

(

) on the upper-right side of the window, click [Import] > [Folder Settings], and then click [Browse] to change the setting.
5. The following window appears, so click [Import Untransferred Images].
6. The following window appears, and the computer starts to transfer images from the camera.
8. The following window appears.
Click the (

) button to close this window.
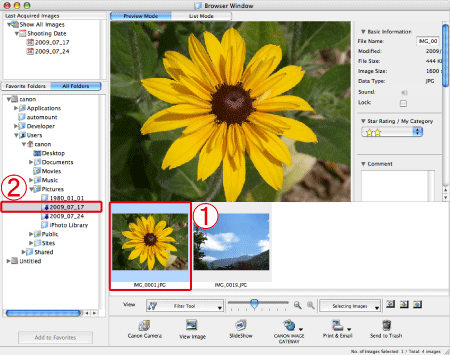
9. When the images have been downloaded, [ImageBrowser] starts. The transferred images are saved to the folder by shooting date, and the images are displayed in the [Browser Window] in [ImageBrowser].

Images that have been transferred to a Macintosh computer

Folder in which images are saved

 DIGITAL terminal on the camera
 [Interface cable]
 Macintosh's USB terminal

 Click [Import Images from Camera].
 (
( ) on the upper-right side of the window, click [Import] > [Folder Settings], and then click [Browse] to change the setting.


 ) button to close this window.
 Images that have been transferred to a Macintosh computer
 Folder in which images are saved