Solution
NOTE
- Make sure the network cable is connected to the machine.
- Make sure an IP address is assigned to the machine.
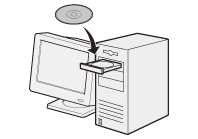
1. Insert the User Software CD-ROM.
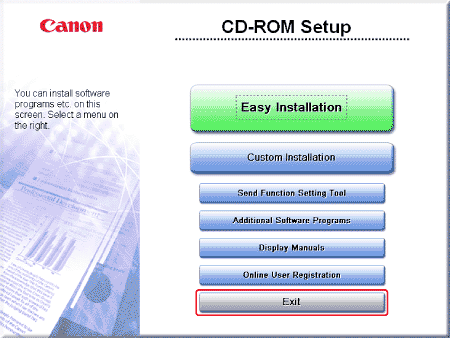
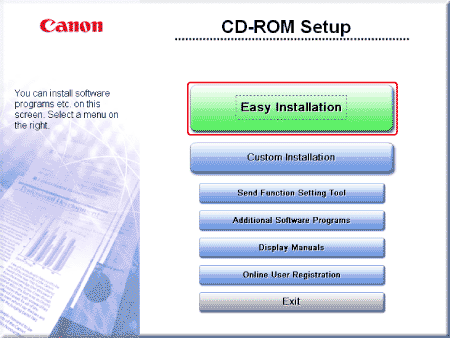
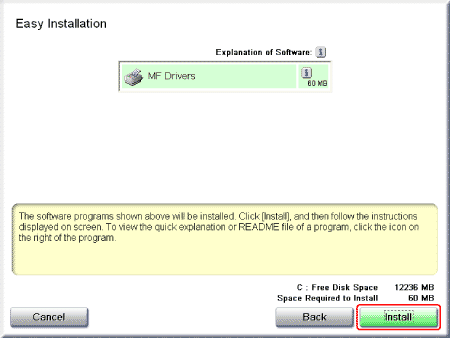
2. Click [Easy Installation].
NOTE
- The options to be displayed differ depending on your country or region.
- If the CD-ROM Setup screen above is not displayed automatically.
- Windows XP: Click [start] on the Windows task bar → [My Computer] → CD-ROM icon.
- Windows 2000: Double-click [My Computer] on the Windows desktop → CD-ROM icon.
- Windows Server 2003: Click [Start] on the Windows task bar → [My Computer] → CD-ROM icon.
- Windows Vista/Server 2008/7: Click [Start] on the Windows task bar → [Computer] → CD-ROM icon.
Right-click the CD-ROM icon and select [Open], then double-click [MInst] ([MInst.exe]).
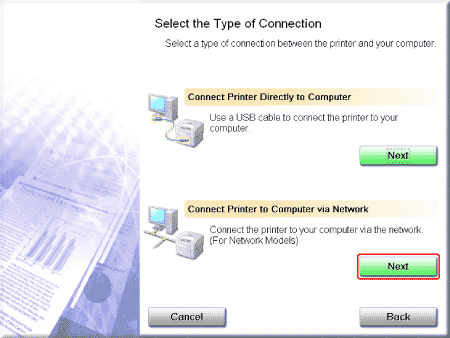
3. Click [Next] in [Connect Printer to Computer via Network]. (Windows 2000 Professional/XP/Vista/7 Only)
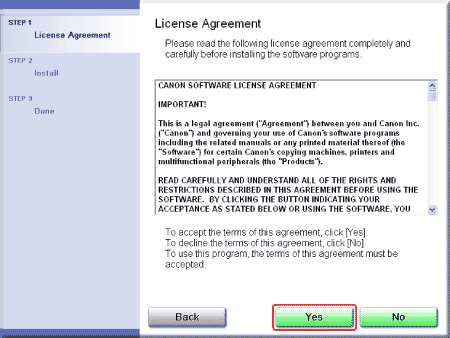
5. Read the contents of License Agreement, and then click [Yes].
NOTE
If the following screen appears, click [Yes].
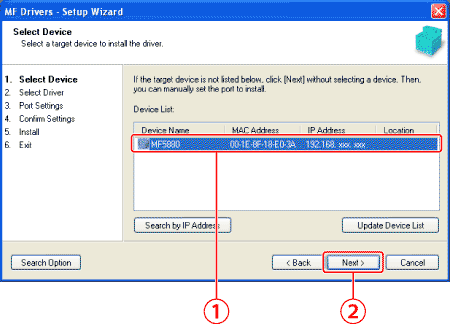
7. Select the device to be installed.
(1) Select the device.
(2) Click [Next].
NOTE
- If no devices are displayed in [Device List], perform the following procedure.
- The computer and device are connected via the network.
- The device is turned on.
- IP address is set correctly.
- The computer and device are on the same subnet.
2. Click [Update Device List].
- If any devices are not displayed by performing the above procedure, perform the following procedure.
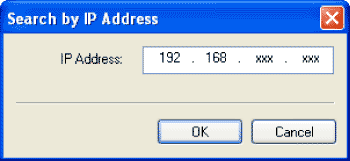
1. Click [Search by IP Address].
2. Enter the IP address of the device to be installed.
* If the number within a segment begins with a zero (0), you can omit the zero (0) at the beginning.
Example: 123.034.050.006 = 123.34.50.6
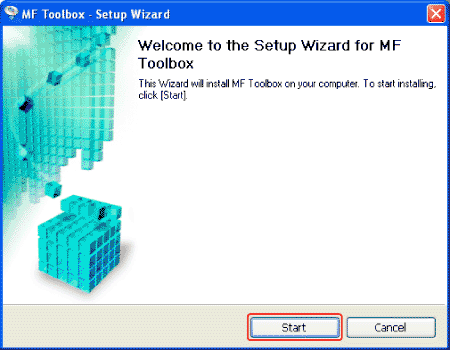
8. Installation starts when clicking [Start].
NOTE
Next, installation of the MF Toolbox starts.
In Windows Server/Server 2003/2008, MF Toolbox is not installed. Proceed to Step 12.
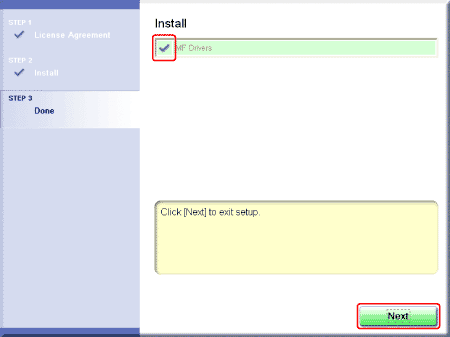
12. Check [

] is selected in [Install], and then click [Next].
13. Restart your computer.
13-1. Select the [Restart Computer Now (Recommended)] check box.
13-2. Click [Restart].
NOTE
If this screen appears, you can remove the CD-ROM from the CD-ROM drive.
1. Insert the User Software CD-ROM.
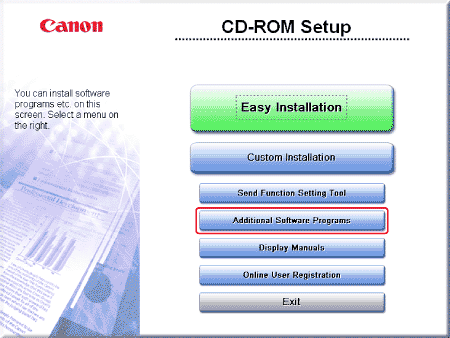
2. Click [Additional Software Programs].
NOTE
- The options to be displayed differ depending on your country or region.
- If the CD-ROM Setup screen above is not displayed automatically.
- Windows XP: Click [start] on the Windows task bar → [My Computer] → CD-ROM icon.
- Windows 2000: Double-click [My Computer] on the Windows desktop → CD-ROM icon.
- Windows Server 2003: Click [Start] on the Windows task bar → [My Computer] → CD-ROM icon.
- Windows Vista/Server 2008/7: Click [Start] on the Windows task bar → [Computer] → CD-ROM icon.
Right-click the CD-ROM icon and select [Open], then double-click [MInst] ([MInst.exe]).
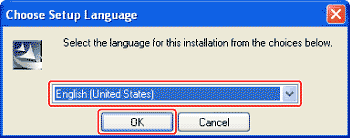
4. Select the same language as your operating system.
4-1. Select a language from the drop down list.
4-2. Click [OK].
NOTE
If you selected a language that is not same as your operating system, the characters may be garbled.
6. Read the contents of License Agreement.
6-1. Select [I accept the terms in the license agreement].
6-2. Click [Next].
NOTE
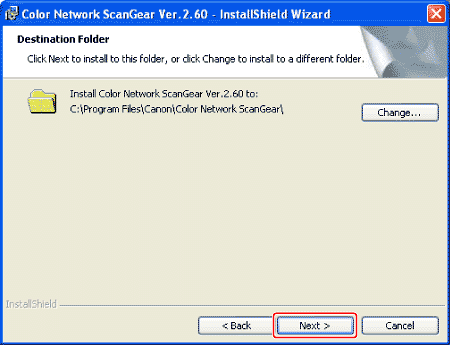
If necessary, specify a location in which the MF Toolbox is installed by clicking [Change].
NOTE
If an error message is displayed indicating that registration of ScanGear Tool or a UDP port as an exception in Windows Firewall has failed, manually register ScanGear Tool and/or the UDP port as an exception in Windows Firewall after installation has finished.
NOTE
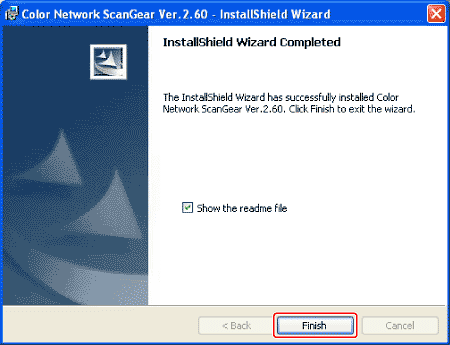
The Readme file opens. After reading it, close the window.
NOTE
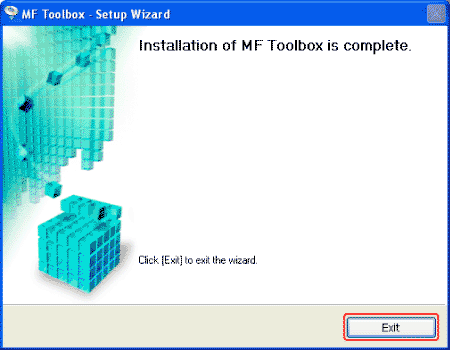
- After clicking [Exit], you can remove the CD-ROM from the CD-ROM drive.
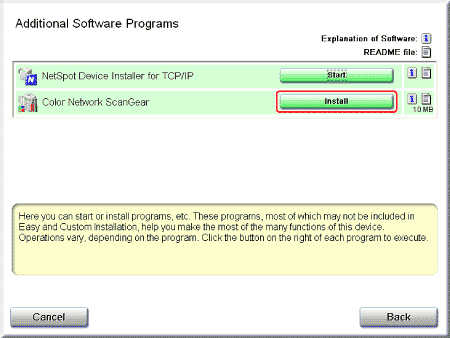
- Next, select the Color Network ScanGear to be used.
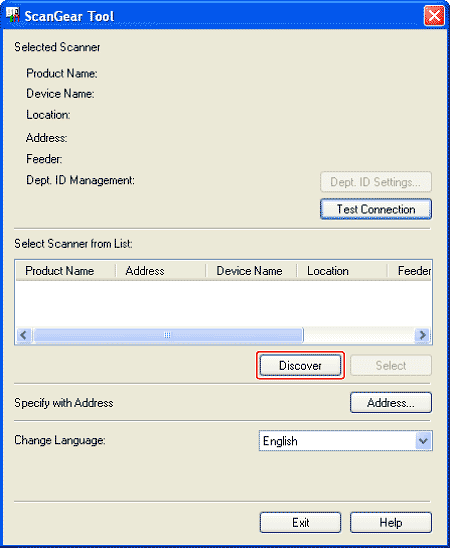
12. Start the ScanGear Tool.
On the [Start] or [start] menu, point to [Programs] or [All Programs] → [Color Network ScanGear] → click [ScanGear Tool].
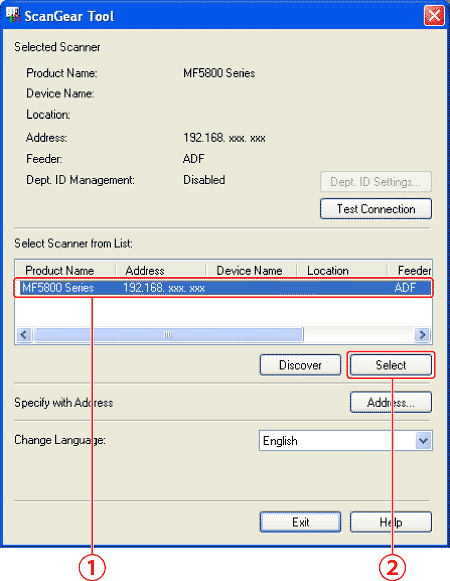
14. Select the device to be installed.
(1) Select the device.
(2) Click [Select].
NOTE
- If no devices are displayed in [Select Scanner from List], perform the following procedure.
- The computer and device are connected via the network.
- The device is turned on.
- IP address is set correctly.
- The computer and device are on the same subnet.
- If any devices are not displayed by performing the above procedure, perform the following procedure.
2. Enter the IP address or Host Name of the device to be installed.
* If the number within a segment begins with a zero (0), you can omit the zero (0) at the beginning.
Example: 123.034.050.006 = 123.34.50.6
* It is possible to specify an IP address or host name outside the subnet.
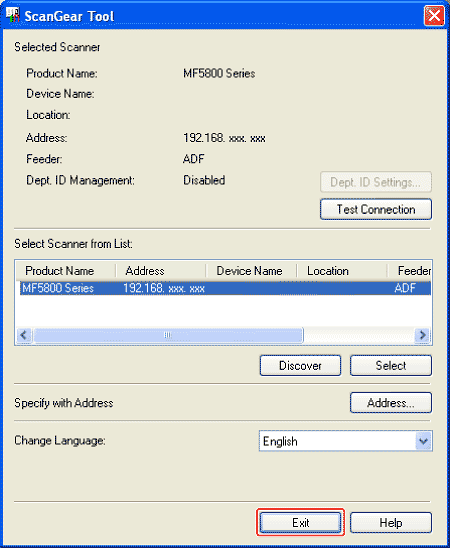
The settings are saved and the ScanGear Tool is closed.
Verify that the driver has been installed successfully and that the machine has been set as the default printer.
NOTE
- If the name of the machine is selected on the [Printer] screen from an application, it is set as the default printer.
- This machine is compatible with Bonjour. If your network environment corresponds to Bonjour, this machine can be used as a printer with/without DHCP function in a server or a router.
1. Open the folder for printers, then verify that the corresponding printer driver icon is displayed.
Windows XP:
- Click [start] on the Windows task bar →[Printers and Faxes].
Windows 2000:
- Click [Start] on the Windows task bar →[Settings] →[Printers].
Windows Server 2003:
- Click [Start] on the Windows task bar →[Printers and Faxes].
Windows Vista:
- Click [Start] on the Windows task bar →[Control Panel] →[Printers].
Windows Server 2008/7:
- Click [Start] on the Windows task bar →[Devices and Printers].
UFRII LT Printer driver
 | Fax driver
 |
2. Set your machine as the default printer.
Select the printer icon for this machine, then select [Set as Default Printer] from the [File] menu.
3. Verify that [Color Network ScanGear] appears in the [All Programs] or [Programs].
Color Network ScanGear




 ] is selected in [Install], and then click [Next].