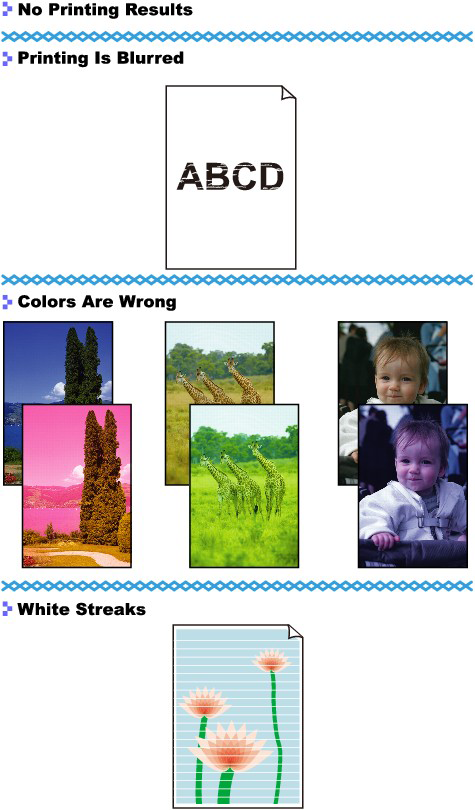
Issue
Cause and Solution
Check 1: Did you confirm the paper and print quality settings?
Check 2: Check the status of ink tanks. Replace the ink tank if the ink has run out
Replacing an Ink Tank
When you need to replace ink tanks, follow the procedure below.
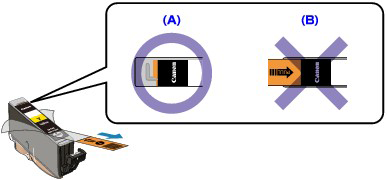
Check 3: Is the orange tape or protective film remaining?
Make sure that all of the protective film is peeled off and the L-shape air hole is exposed, as illustrated in (A).
If the orange tape is left as in (B), pull the orange tape and remove it.
Check 4: Print the Nozzle Check Pattern and perform any necessary maintenance operations such as Print Head Cleaning
Print the Nozzle Check Pattern to determine whether the ink ejects properly from the print head nozzles.
- If the Nozzle Check Pattern is not printed correctly:
Check to see if a particular color's ink tank is not empty.
If the Nozzle Check Pattern is not printed correctly though ink is sufficient, perform the Print Head Cleaning and try printing the Nozzle Check Pattern again.
- If the problem is not resolved after performing the Print Head Cleaning twice:
Perform the Print Head Deep Cleaning.
If the problem is not resolved after performing the Print Head Deep Cleaning, turn off the printer and perform another Print Head Deep Cleaning after 24 hours.
- If the problem is not resolved after performing the Print Head Deep Cleaning twice:
If Print Head Deep Cleaning does not resolve the problem, the Print Head may be damaged. Contact the service center.
Check 5: When using paper with one printable surface, make sure that the paper is loaded with the printable side facing up
Printing on the wrong side of such paper may cause unclear prints or prints with reduced quality.
Refer to the paper's instruction manual for detailed information on the printable side.


