
Live View Shooting (Photos) with the Default Settings (EOS REBEL T3i/EOS 600D)
Solution
With your camera, you can shoot photos while viewing the image on the camera's LCD monitor. This is called "Live View shooting."
This page describes how to shoot still photos using the Live View function in default settings.
For details on how to change settings to enable Live View shooting, please refer to the related information section.
IMPORTANT
If you handhold the camera and shoot while viewing the LCD monitor, there are cases in which crisp images cannot be obtained due to camera shake. It is recommended to use a tripod when shooting.
1. Set the power switch to <ON>.
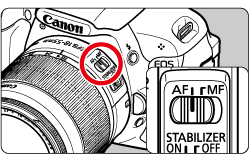
2. Set the lens focus mode switch to <AF>.
3. Press the <  > (Live View shooting) button. The Live View image will appear on the LCD monitor.
> (Live View shooting) button. The Live View image will appear on the LCD monitor.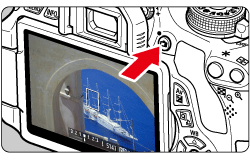
4. The AF point will appear. Press the <Cross Keys> to move the AF point to where you want to focus.
- It cannot go to the edges of the picture.
- To return the AF point to the center, press the <SET> button or <
 > button.
NOTE
If the AF point is not displayed, press the <SET> button or the < > button.
> button. 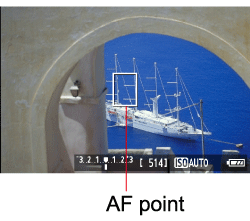
5. Aim the AF point over the subject and press the shutter button halfway.
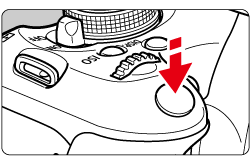
- When focus is achieved, the AF point will turn green and the beeper will sound.
- If focus is not achieved, the AF point will turn orange.
6. Press the shutter button completely.

- The picture will be taken and the captured image is displayed on the LCD monitor.
- After the image review ends, the camera will return to Live View shooting automatically.
7. Press the < > button to end the Live View shooting.
> button to end the Live View shooting.CAUTION
During Live View shooting, do not point the lens toward the sun. The sun's heat can damage the camera's internal components.