Solution
CAUTION
When loading paper, take care not to cut your hands on the edges of the paper.
IMPORTANT
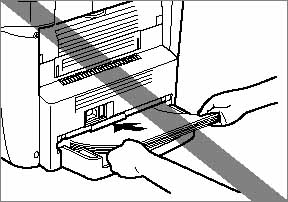
Do not load paper from the back of the machine with the cassette in place. Doing so may damage the paper feeding assembly inside the machine.
NOTE
a. When using the multi-purpose feeder, the paper in the multi-purpose feeder is given priority over the paper in the cassette.
b. The cassette holds up to approximately 250 sheets of 64 g/m2 paper.

Loading Paper in the Cassette
1. Fan the paper stack first, then tap the edges on a flat surface to even the stack.
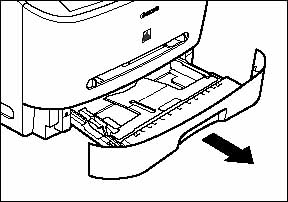
2. Pull out the cassette completely.
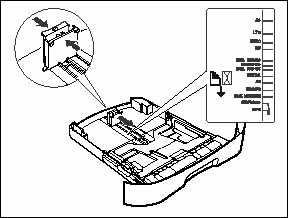
3. While holding the lock release lever on the paper guide at the rear of the cassette, slide the paper guide to the mark indicating the desired paper size.
IMPORTANT
If the paper guide is not adjusted correctly for the size of the paper, the quality of your printouts may be adversely affected.
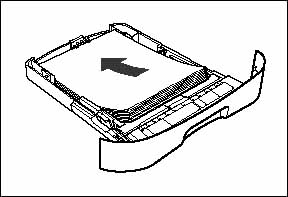
4. Load the paper stack in the cassette with the print side down.
When you load letter head paper, position the paper with the print side down (logo side) and load it so that the top of the paper feeds first in the cassette.
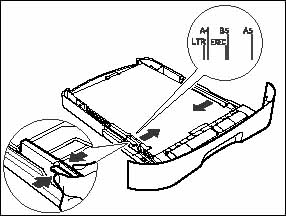
5. Pinch and slide the width slide guides to fit the paper stack.
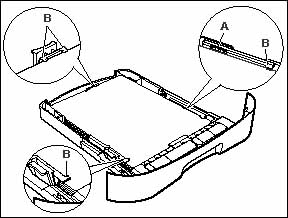
Make sure the paper stack does not exceed the load limit mark (A) and it is loaded under the hooks (B) on the paper guides.
(A): Load limit mark
(B): Hooks
IMPORTANT
a. Do not load different size and type of paper at the same time.
b. Do not load extra paper when there is still paper left in the cassette. If you load extra paper while making copies, remove the loaded paper first. Then put it together with the extra paper and tap the edges. After that, reload it in the cassette.
6. Insert the cassette into the machine.
NOTE
If you do not completely insert the cassette into the machine, paper jams may occur.
7. Specify the paper size.
- Press [Menu], [Left cursor] or [Right cursor] to select [PAPER SETTINGS] and press [OK].
- Press [Left cursor] or [Right cursor] to select [CASSETTE] and press [OK].
- Press [Left cursor] or [Right cursor] to select [PAPER SIZE] and press [OK].
- Press [Left cursor] or [Right cursor] to select the appropriate paper size (A4, B5, A5, EXECUTIV (Executive), and LTR (Letter)) and press [OK].
8. Specify the paper type.
- Press [Menu], [Left cursor] or [Right cursor] to select [PAPER SETTINGS] and press [OK].
- Press [Left cursor] or [Right cursor] to select [CASSETTE] and press [OK].
- Press [Left cursor] or [Right cursor] to select [PAPER TYPE] and press [OK].
- Press [Left cursor] or [Right cursor] to select the appropriate paper type and press [OK].
You can select from the following paper types:
- Plain paper (64 g/m2 to 90 g/m2): [PLAIN PAPER], [PLAIN PAPER L]*1
- Heavy paper (91 g/m2 to 128 g/m2): [HEAVY PAPER], [HEAVY PAPER H]*2
- Transparency: [TRANSPARENCY]
- Envelope: [HEAVY PAPER], [HEAVY PAPER H]*2
*1 If paper curls excessively when printed with [PLAIN PAPER] selected, select [PLAIN PAPER L].
*2 If print fixing is not sufficient when printed with [HEAVY PAPER] selected, select [HEAVY PAPER H].

Loading Paper in the Multi-Purpose Feeder
Use the multi-purpose feeder when you want to copy or print on different paper than is in the cassette. Load paper one by one in the multi-purpose feeder then press [Start] key.
NOTE
The paper in the multi-purpose feeder is fed prior to the paper in the cassette.
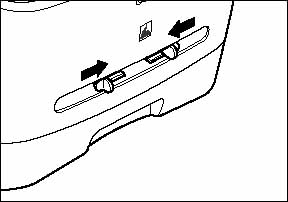
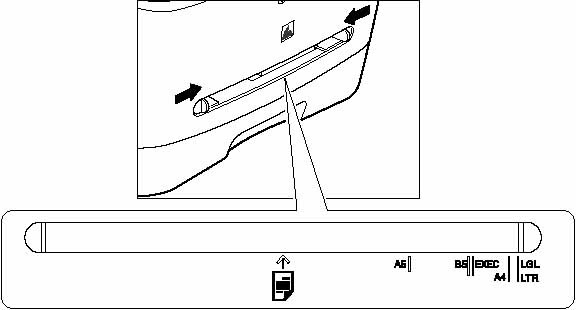
1. Slide the paper guides to the mark of the desired paper size.
IMPORTANT
If the paper guides are not adjusted correctly for the size of the paper, the quality of your printouts may be skewed or may jam.
2. Insert the paper into the multi-purpose feeder with the desired print side up.
NOTE
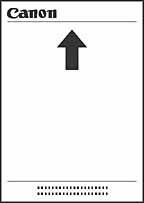
When you load paper with letter head, position the paper with the print side up (logo side) and insert it so that the top of the paper feeds first in the multi-purpose feeder.
3. Specify the paper size.
- Press [Menu], [Left cursor] or [Right cursor] to select [PAPER SETTINGS] and press [OK].
- Press [Left cursor] or [Right cursor] to select [MP TRAY] and press [OK].
- Press [Left cursor] or [Right cursor] to select [PAPER SIZE] and press [OK].
- Press [Left cursor] or [Right cursor] to select the appropriate paper size (A4, B5, A5, EXECUTIV (Executive), COM10, MONARCH, DL, ISO-C5, LTR (Letter), and LGL (Legal)) and press [OK].
4. Specify the paper type.
- Press [Menu], [Left cursor] or [Right cursor] to select [PAPER SETTINGS] and press [OK].
- Press [Left cursor] or [Right cursor] to select [MP TRAY] and press [OK].
- Press [Left cursor] or [Right cursor] to select [PAPER TYPE] and press [OK].
- Press [Left cursor] or [Right cursor] to select the appropriate paper type and press [OK].
You can select from the following paper types:
- Plain paper (64 g/m2 to 90 g/m2): [PLAIN PAPER], [PLAIN PAPER L]*1
- Heavy paper (91 g/m2 to 128 g/m2): [HEAVY PAPER], [HEAVY PAPER H]*2
- Transparency: [TRANSPARENCY]
- Envelope: [HEAVY PAPER], [HEAVY PAPER H]*2
*1 If paper curls excessively when printed with [PLAIN PAPER] selected, select [PLAIN PAPER L].
*2 If print fixing is not sufficient when printed with [HEAVY PAPER] selected, select [HEAVY PAPER H].

Loading an Envelope in the Multi-Purpose Feeder
Use the multi-purpose feeder when you want to copy or print an envelope one by one.
IMPORTANT
The recommended envelopes are COM10, MONARCH, DL, and ISO-C5. Using other envelopes may affect the quality of the printout.
NOTE
When using the multi-purpose feeder, the envelope in the multi-purpose feeder is given priority over the paper in the cassette.
1. Slide the paper guides to fit the size of the envelope you want to load.
IMPORTANT
If the paper guides are not adjusted correctly for the size of the envelope, the quality of your printouts may be skewed or may jam.
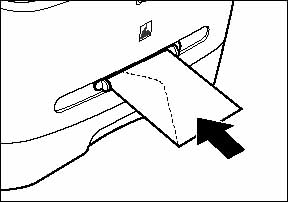
2. Insert the envelope into the multi-purpose feeder with the desired print side up and the right edge (i.e., closer to the stamp) first.
If the envelope to be loaded has a flap on the short edge, this edge must enter the machine first. Not loading it this way will result in a paper jam.
3. Specify the paper size.
- Press [Menu], [Left cursor] or [Right cursor] to select [PAPER SETTINGS] and press [OK].
- Press [Left cursor] or [Right cursor] to select [MP TRAY] and press [OK].
- Press [Left cursor] or [Right cursor] to select [PAPER SIZE] and press [OK].
- Press [Left cursor] or [Right cursor] to select the envelope type (COM10, MONARCH, DL, ISO-C5) and press [OK].
4. Specify the paper type.
- Press [Menu], [Left cursor] or [Right cursor] to select [PAPER SETTINGS] and press [OK].
- Press [Left cursor] or [Right cursor] to select [MP TRAY] and press [OK].
- Press [Left cursor] or [Right cursor] to select [PAPER TYPE] and press [OK].
- Press [Left cursor] or [Right cursor] to select [HEAVY PAPER] or [HEAVY PAPER H]* and press [OK].
* If print fixing is not sufficient when printed with [HEAVY PAPER] selected, select [HEAVY PAPER H].
 Loading Paper in the Cassette
 Loading Paper in the Multi-Purpose Feeder

 Loading an Envelope in the Multi-Purpose Feeder