Solution
Before you install the software, be sure to:
- Confirm the machine is not connected to your computer.
- Turn on the machine.
- Quit any Windows application running on your computer.
IMPORTANT
If you are using Windows 2000/XP, be sure to log on as a member of Administrators. The full control access right is necessary for the installation of the drivers.
NOTE
a. Use of a cable 9.8 ft (3 m) long or less is recommended.
b. The screen shots shown are from Windows XP.

Installing the Printer Driver on Your Computer
1. Insert the CD-ROM into your CD-ROM drive.
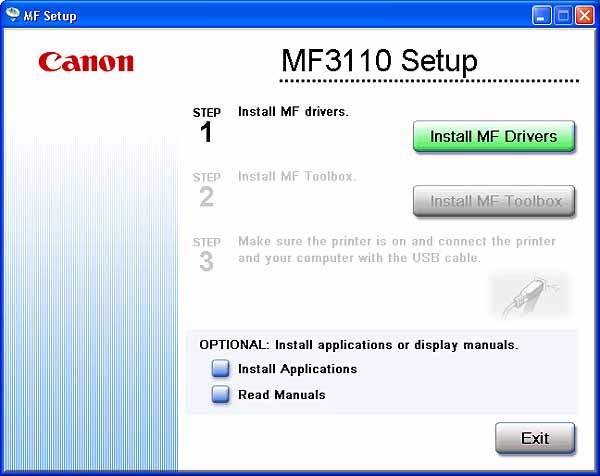
The [MF3110 Setup] screen appears.
Install the software following steps 1, 2 and 3 in the [MF3110 Setup] screen.
If the [MF3110 Setup] screen is not displayed, on the Windows desktop, click [start], then click [My Computer] (Windows 98/Me/2000: double-click [My Computer]). Open the CD-ROM icon and double-click [Setup (Setup.exe)].
If you are installing from a copy saved on a network or hard disk, double-click [Setup (Setup.exe)] in the copy.

Step 1 Install the MF Drivers
1. In the [MF3110 Setup] screen, click [Install MF Drivers].
2. Read the License Agreement and click [Yes].
3. Follow the on-screen instructions to install the software.
4. Click [Finish].
Step 2 Install the MF Toolbox
1. In the [MF3110 Setup] screen, click [Install MF Toolbox].
If you have closed the [MF3110 Setup] screen, on the Windows desktop, click [start], then click [My Computer] (Windows 98/Me/2000: double-click [My Computer]). Open the CD-ROM icon and double-click [Setup (Setup.exe)].
If you are installing from a copy saved on a network or hard disk, double-click [Setup (Setup.exe)] in the copy.
2. Click [Next].
4. Read the License Agreement and click [Yes].
5. When the [Choose Destination Location] dialog box appears, click [Next].
Step 3 Connect the USB Cable
1. Make sure that the machine is turned on.
2. Connect the USB cable to the machine and computer USB port.
When you connect the USB cable to the computer, the machine is automatically detected as a new hardware. Wait for a while as your computer performs various settings.
Depending on your computer, a message may display asking you to restart your computer.
After restarting your computer, wait for a while for your computer to continue performing various settings.