Solution
IMPORTANT
- If you are using Windows 2000/XP/Server 2003, be sure to log on as a member of Administrators when starting up.
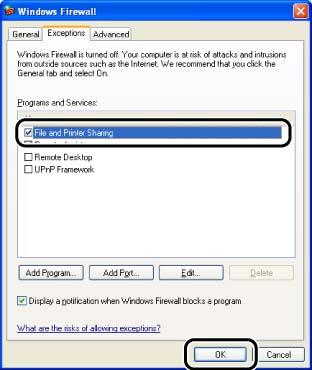
- If you are using Windows XP Service Pack 2 or another operating system equipped with Windows Firewall on a client computer, configure the following settings. If you do not perform the following settings on the client computer, the status may not be displayed on the Printer Status Window properly, and some of the printer functions may not operate properly.
1. From the [Start] menu, select [Control Panel], click [Network and Internet Connections], and then click [Windows Firewall].
2. In the [Exceptions] sheet in the [Windows Firewall] dialog box, select the [File and Printer Sharing] check box, and then click [OK].
NOTE
- When installing the printer driver on a computer (client) that is using the printer via the print server by sharing the printer on the network, the print server needs to be configured properly. If the print server has not been configured, see Related Information at the end of this page to configure it.
- Clients can use either Windows 98/Me or Windows 2000/XP/Server 2003.
- If your print server is Windows 98/Me, you cannot download and install the software on Windows 2000/XP/Server 2003.
- The screen shots used in this section are from Windows XP Home Edition.
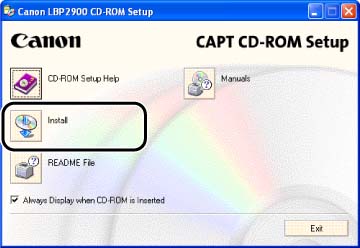
1. Insert the "LBP2900 User Software" CD-ROM supplied with the printer into the CD-ROM drive.
If the CD-ROM is already in the drive, eject the disk and re-insert it into the drive.
NOTE
If CD-ROM Setup does not appear automatically, select [Run] from the [Start] menu, enter "D:\English\CNAB4MNU.exe", and then click [OK]. (The CD-ROM drive name is indicated as "D:" in this troubleshooting. The CD-ROM drive name may differ depending on the computer you are using.)
2. Click [Install].
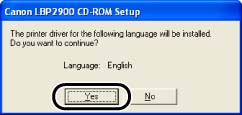
3. Confirm the language and click [Yes].
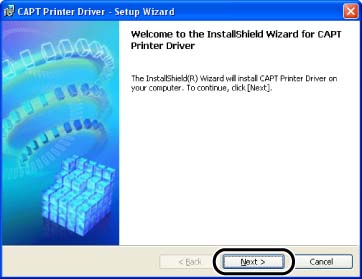
After the preparation for installation is completed, the CAPT (Canon Advanced Printing Technology) software installer starts up, and the [Setup Wizard] dialog box appears.
4. Click [Next].
5. Confirm the contents, select [I accept the terms in the license agreement], and then click [Next].
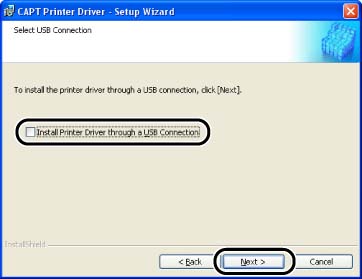
6. If the [Install Printer Driver through a USB Connection] check box is selected, clear the check box, then click [Next].
NOTE
Do not select [Install Printer Driver through a USB Connection].
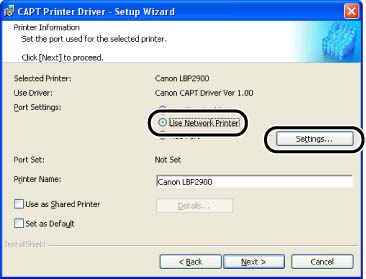
7. Select [Use Network Printer] for [Port Settings], then click [Settings].
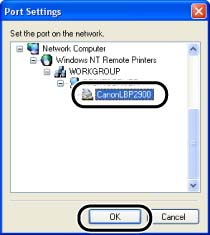
8. Select the directory of the print server, then click [OK].
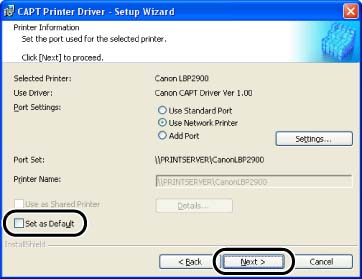
9. Select whether to use this printer as the default printer, then click [Next].
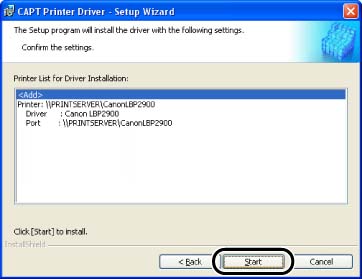
10. Click [Start].
If you are using Windows XP Service Pack 2 or another operating system equipped with Windows Firewall, the following window is displayed. Click [No].
Select [Yes] only when the computer that you are currently installing the printer driver is to be used as the print server.
11. The message <Installation cannot be stopped once it starts. Do you want to continue?> is displayed. Click [Yes].
Installation of the printer driver starts.
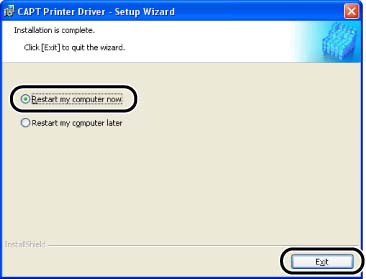
12. The window that informs you the completion of the installation is displayed. Select [Restart my computer now], then click [Exit].
Windows restarts.
IMPORTANT
If you are using Windows XP Service Pack 2 or another operating system equipped with Windows Firewall as a client, you need to configure Windows Firewall to unblock communication with the print server. If you do not clear the block, the printer status may not be displayed properly in the Printer Status Window, and some of the printer functions may not operate properly.
For configuring Windows Firewall to unblock communication with the print server, see Related Information at the end of this page.
