Issue
Cause and Solution
Use the following procedure to load custom paper into the multi-purpose tray.
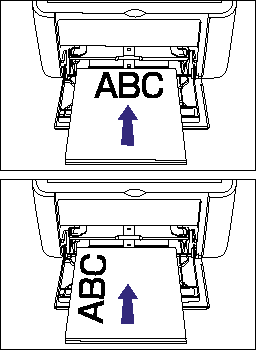
Always load paper lengthways into the multi-purpose tray.
IMPORTANT
- Do not touch or pull paper out of the multi-purpose tray during printing. Doing so may cause the printer to malfunction.
- If you are refilling the multi-purpose tray when there is still paper in the tray, take out the remaining paper and align it properly with the new paper before loading it into the tray.
- Use the paper capacity for each type of paper as a guide to the number of sheets of paper that can be printed continuously.
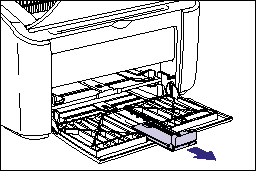
1. Pull out the rear paper guide.
IMPORTANT
Make sure you pull out the auxiliary tray when you load paper in the multi-purpose tray.
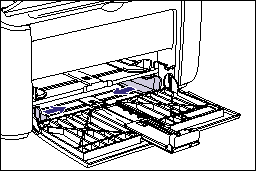
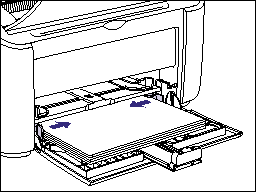
2. Push the side paper guides out a little wider than the actual width of the paper.
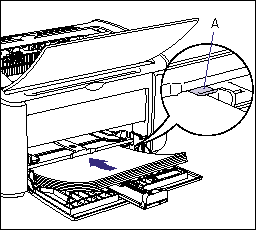
3. Gently load the paper with the printing side facing up until it touches the back of the tray.
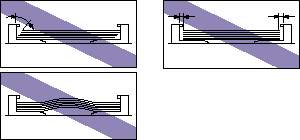
Make sure that the paper passes under the paper limit guides (A).
IMPORTANT
- The number of sheets that can be loaded in the multi-purpose tray is as follows. Check that there is sufficient clear space between the paper limit guides and the paper. If there is no free space, slightly reduce the number of envelopes.
- Plain Paper :Approx. 150 sheets (64 g/m2)
- Heavy Paper :Approx. 60 sheets (128 g/m2)
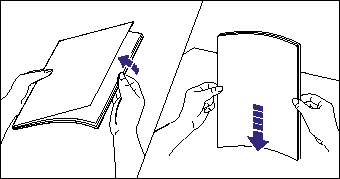
- If you use paper that has been poorly cut, the paper may have a tendency to double-feed. In this case, thoroughly line up the edges of the paper on a flat surface before loading it.
- Load the paper so that it is straight.
- If the rear edge of the paper stack is not properly aligned, it may result in misfeeds or paper jams.
- If the paper is curled or folded at the corners, flatten it out before loading.
NOTE
To print on letterhead paper or paper with a logo already printed on it, load the paper so that the printed side is facing up and the top of the paper is at the far end.
4. Slide the paper guides to fit both sides of the stack.
IMPORTANT
Always make sure the paper guides match the width of the paper. If the paper guides are too loose or too tight, the paper will not feed properly and this will cause paper jams.
5. Adjust the rear paper guide to match the paper.
- If the custom paper that you are using is over 190 mm in length:
Adjust the rear paper guide to match the paper.
IMPORTANT
If you run out of paper and then refill the paper tray, the Paper Indicator will flash.
Press the

(Paper Key) to resume printing.
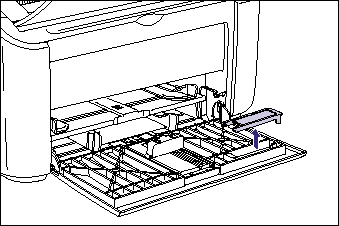
- If the custom paper that you are using is less than 190 mm in length:
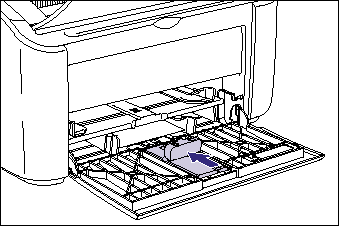
Move the rear paper guide to the position shown in the diagram.
Remove the small paper guide from the multi-purpose tray.
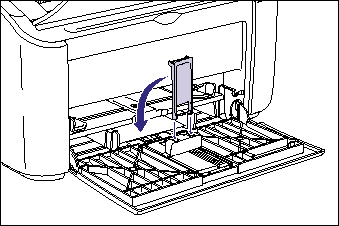
Insert the small paper guide from directly above, as shown in the diagram, then fold it towards the back.
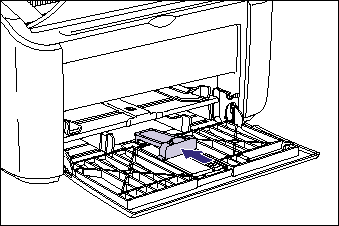
Slide the rear paper guide to align the small paper guide with the paper.
IMPORTANT
If you run out of paper and then refill the paper tray, the Paper Indicator will flash.
Press the

(Paper Key) to resume printing.
If you want to print after loading custom size paper in the paper source, you need to register the custom paper size in the printer driver, and then configure the printer driver.
For more details, see "How to register a custom paper size (non-standard paper)" in Related Information at the end of this page.
6. Specify the following options in the printer driver.
| Settings Sheet | Settings | Description |
| [Page Setup] Sheet | [Page Size] | Select the paper size of the document created by the application. |
| [Output Size] | From [Output Size], select the size of the loaded paper as needed.
Leave the setting at [Match Page Size] when the page size and the size of the paper loaded in the multi-purpose tray are the same, since there is no need to change the setting. |
|
| [Paper Source] Sheet | [Paper Type] | Select the paper type of the loaded paper.
Select [Plain Paper] for plain paper and [Heavy Paper] for heavy paper. |
|
IMPORTANT
When the settings for [Page Size] and [Output Size] are different from each other, the scale factor is adjusted automatically.
NOTE
"User's Guide" (PDF manual) on the CD-ROM supplied with the printer provides explanations on using the features of the printer and printer driver. By specifying the settings for the printer and printer driver for each job, you can make the best use of the printer and its functions.


 (Paper Key) to resume printing.
 (Paper Key) to resume printing.