Solution
This page describes how to shoot movies with the default settings.
For details on how to change settings to shoot movies, please refer to the Related Information.
IMPORTANT
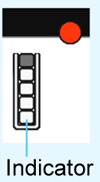
When shooting movies, use a large-capacity card with a fast reading/writing speed as shown in the table.
IPB : 6 MB/sec. or faster
ALL-I : (I-only) 20 MB/sec. or faster
- If you use a slow-writing card when shooting movies, the movie may not be recorded properly. Also, if you play back a movie on a card with a slow reading speed, the movie may not play back properly.
1. Set the power switch to <ON>.
2. Set the lens focus mode switch to <AF>.
3.Set the Mode Dial to any shooting mode except <M>.
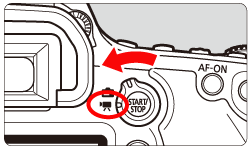
4. Set the Live View shooting/Movie shooting switch to <

> .
The reflex mirror will make a sound, then the image will appear on the LCD monitor.
5. Before shooting a movie, focus with AF or manual focus.
When you press the shutter button halfway, the camera will focus with the current AF method.
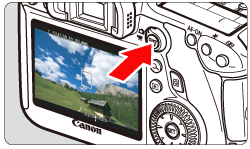
Press the <

> button to start shooting a movie.
While the movie is being shot, the[

] mark will be displayed on the upper right of the screen.
7. To stop shooting the movie, press the <

> button again.
CAUTION
During movie shooting, do not point the lens toward the sun. The sun's heat can damage the camera's internal components.
NOTE
Recording and Image Quality
- The movie file format will be MOV.
- Even if you shoot a movie exceeding 4 GB, you can keep shooting without interruption.
During movie shooting, approx. 30 sec. before the movie reaches the 4 GB file size, the elapsed shooting time or time code displayed in the movie-shooting image will start blinking. If you keep shooting until the movie file size exceeds 4 GB, a new movie file will be created automatically and the elapsed shooting time or time code will stop blinking.
When you play back the movie, you will have to play each movie file individually. Movie files cannot play back consecutively automatically. After the movie playback ends, select the next movie to be played.
At [1920x1080], the maximum recording time of a single movie clip will be approx. 16 min. At [1280x720], the maximum recording time of a single movie clip will be approx. 18 min.At [640x480], the maximum recording time of a single movie clip will be approx. 48 min.
The maximum recording time of one movie clip is 29 min. 59 sec. If the movie shooting time reaches 29 min. 59 sec., the movie shooting will stop automatically. You can start shooting a movie again by pressing the <

> button. (A new movie file starts being recorded.)
- An increase of the camera’s internal temperature may cause movie shooting to stop before the maximum recording time shown above.
- The camera’s built-in microphone will also pick up camera operation noise. Using a commercially-available external microphone can prevent (or reduce) these noises from being recorded.
- If you connect the camera to a TV set (p.261, 264) and shoot a movie, the TV will not output any sound during the shooting. However, the sound will be properly recorded.
IMPORTANT


 > .
> .

 > button to start shooting a movie.
 ] mark will be displayed on the upper right of the screen.

 > button again.
 > button. (A new movie file starts being recorded.)
 ] and Red [
  ] Internal Temperature Warning Icons
 ] or red [
  ] icon will appear.
 ] icon indicates that the image quality of still photos will deteriorate. You should stop still shooting and allow the camera’s internal temperature to cool before shooting again. Since the movie’s image quality will hardly deteriorate, movie shooting will continue.
 ] icon indicates that the movie shooting will soon be terminated automatically. If this happens, you will not be able to shoot again until the camera’s internal temperature decreases. Turn off the power and let the camera rest for a while.
 ] or [
  ] icon to appear earlier. When you are not shooting, turn off the camera.