27-Jun-2013
8201844200
 ] Playback tab 3 / <
 >: Custom White Balance
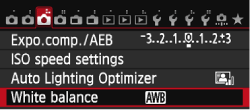
 ] tab, select [White balance], then press <
 >.
>.
 >.
>.
| Display | Mode | Color Temperature (Approx. K: Kelvin) |
|---|---|---|
 | Auto | 3000-7000 |
 | Daylight | 5200 |
 | Shade | 7000 |
 | Cloudy, twilight, sunset | 6000 |
 | Tungsten light | 3200 |
 | White fluorescent light | 4000 |
 | Flash use | Automatically set* |
 | Custom | 2000-10000 |
 | Color temperature | 2500-10000 |
 >(Custom White Balance) enables you to manually set the white balance for a specific light source for better accuracy. Perform this procedure under the actual light source to be used. For more information on registering custom white balance, please refer to the instruction manual that came with your camera.