Installing the Software
Solution
Although a CD-ROM is not included with the camera, installers for software applications can be downloaded from the Canon website.
To install all the software applications, please use the [Easy Installation] method.
To select the applications to be installed, please use the [Custom Installation] method.
To install applications individually, please use the [Custom Installation] method.
IMPORTANT
- Using the software, you can update to the latest version, and download new functions via the Internet (some software excluded). Be sure to install the software on a computer with an Internet connection so you can use this function.
- Internet access is required to use this function, and any ISP account charges and access fees must be paid separately.
- In this section, Windows 7 is used as an example. The on-screen displays and operations may differ depending on the operating system.
- An account with Administrator privileges is required for installing and uninstalling software.
- Installation may not be possible when security software is running.
The [Easy Installation] method can be used to install all of the software.
- Installation procedures are explained below.
1. With a computer connected to the Internet, access the Canon website and download the software.
IMPORTANT
- [ Digital Camera Software 7.1 ] supports these camera models.
*Software version information included here reflects current version information as of January 2016.
2. Double-click the downloaded file to open it.

3. The file will be extracted. Double-click the folder to open it.

4. Double-click [ CanonDCS7.1 W.exe ].

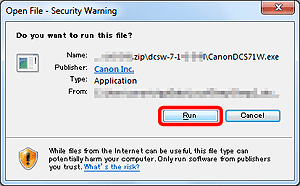
5. The following screen will appear. Click [Run].
6. Select the area in which you live.

7. Select the country where you live, and then click [Next].

8. Select your language.

9. The screen below appears.
Click [Easy Installation].

10. Click [OK] when the following screen appears.

11. The confirmation screen for the software to be installed appears. Click [Install].

12. The following screen will appear. Read the content carefully, and click [Yes] if you agree to the terms.
Please note: It will not be possible to install the software if you do not click [Yes].

NOTE
The [User Account Control] screen may be displayed depending on the computer model you use. In this case, please click [Yes].

13. The following screen appears. Please click [Yes].

14. Installation begins.
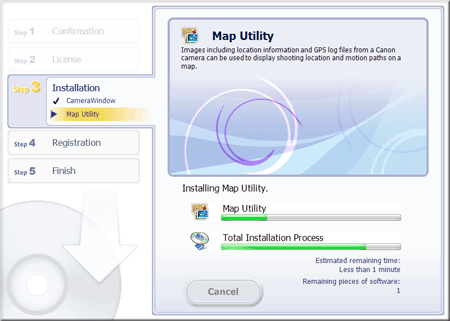
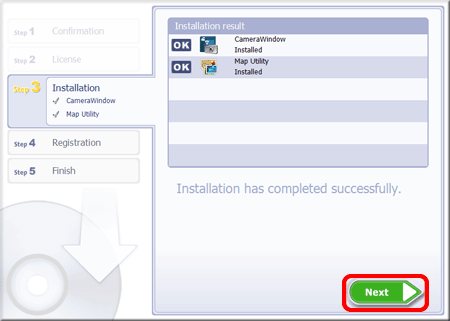
15. After installation has finished, click [Next].
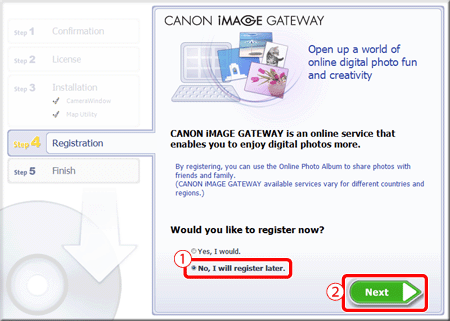
16. The CANON iMAGE GATEWAY registration screen appears.
In this example  [No, I will register later] has been selected, and
  [Next] has been clicked.
 [No, I will register later] has been selected, and
  [Next] has been clicked.
 (To register in CANON iMAGE GATEWAY, select [Yes, I would] and complete the registration procedure.)
17. The following screen appears. Click [OK].

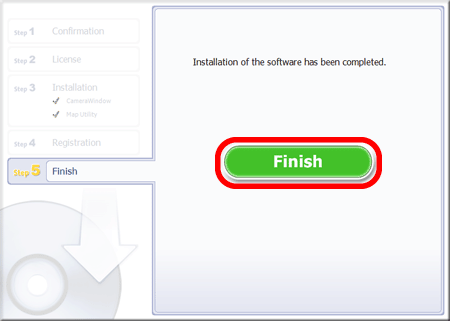
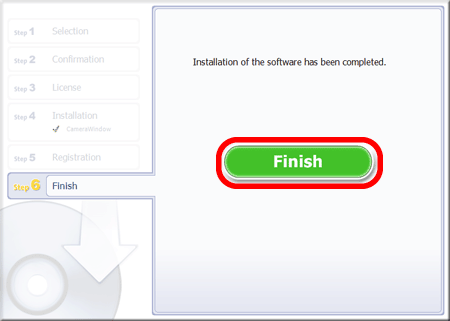
18. The following screen appears after installation has been completed. Please click [Finish].
NOTE
If restating the computer is necessary, the [Restart] screen will be displayed. In this case, click [Restart] to restart the computer.
This completes the [Easy Installation] method for installing the software.
The [Custom Installation] method can be used to select the software to be installed.
The custom installation method can also be used to reinstall applications such as CameraWindow 8.10 or Map Utility.
- [ Digital Camera Software 7.1 ] can be downloaded from the Canon website and used to install the applications shown in the table below.
| Software Application | Overview |
|---|---|
 : CameraWindow : CameraWindow | Import images to your computer |
 : Image Transfer Utility*1 : Image Transfer Utility*1 | Set up Image Sync and receive images |
 : Map Utility : Map Utility | Use a map to view GPS information that has been added to images |
- Installation procedures are explained below.
1. With a computer connected to the Internet, access the Canon website and download the software.
IMPORTANT
- [ Digital Camera Software 7.1 ] supports these camera models.
*Software version information included here reflects current version information as of January 2016.
2. Double-click the downloaded file to open it.

3. The file will be extracted. Double-click the folder to open it

4. Double-click [ CanonDCS7.1 W.exe ].

5. The following screen will appear. Click [Run].

6. Select the area in which you live.

7. Select the country where you live, and then click [Next].

8. Select your language.

9. The screen below appears.
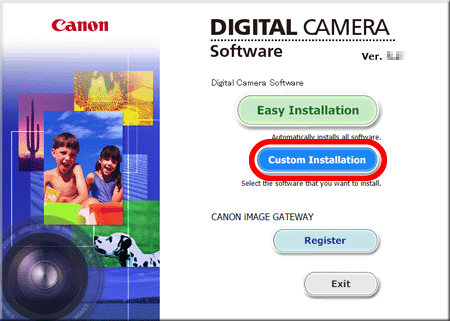
Click [Custom Installation].
10. Click [OK] when the following screen appears.

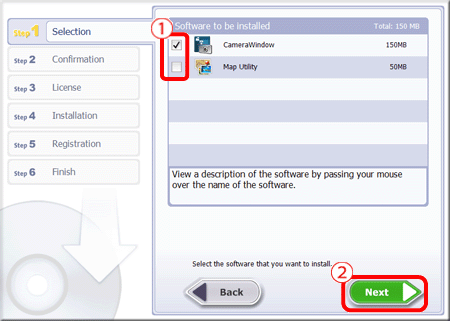
11. Select the software to be installed.
 : Append the desired applications with a
  .
. : After selecting all the desired applications, please click [Next].
12. The confirmation screen for the software to be installed appears. Click [Install].
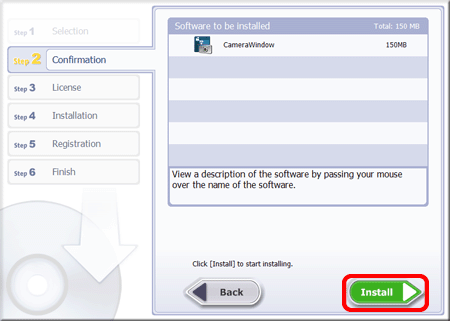
13. The following screen will appear. Read the content carefully, and click [Yes] if you agree to the terms.
Please note: It will not be possible to install the software if you do not click [Yes].

NOTE
The [User Account Control] screen may be displayed depending on the computer model you use. In this case, please click [Yes].

REFERENCE
When installing [Camera Window] the following screen will also be displayed. Click [Yes].

14. Installation begins.
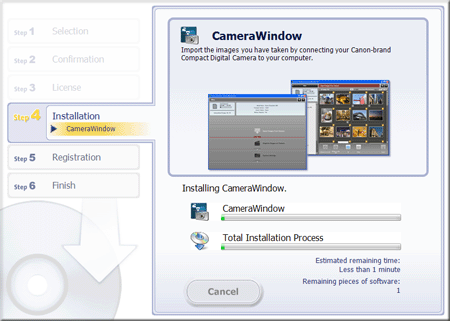
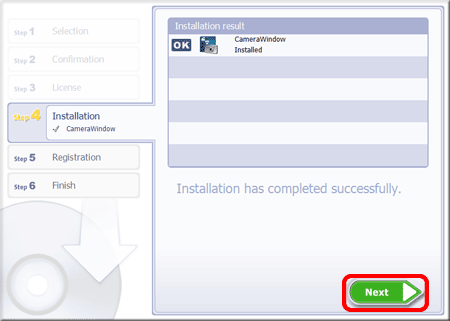
15. After installation has finished, click [Next].
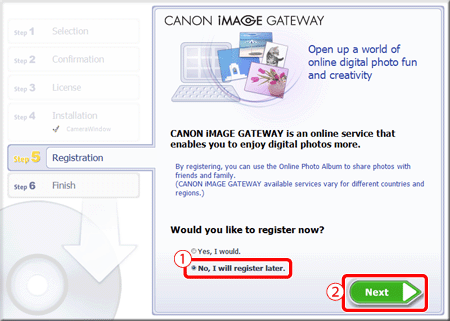
16. The CANON iMAGE GATEWAY registration screen appears.
In this example  [No, I will register later] has been selected, and
  [Next] has been clicked.
 [No, I will register later] has been selected, and
  [Next] has been clicked.
 (To register in CANON iMAGE GATEWAY, select [Yes, I would] and complete the registration procedure.)
17. The following screen appears. Click [OK].

18. The following screen appears after installation has been completed. Please click [Finish].
NOTE
If restating the computer is necessary, the [Restart] screen will be displayed. In this case, click [Restart] to restart the computer.
This completes the [Custom Installation] method for installing the software.


