Displaying the Image on a TV Set While Shooting Movies (EOS REBEL T6 / EOS 1300D)
Solution
You can connect your camera to a High-Definition TV set to display the image on the TV set while shooting movies.
To connect and shoot, follow these steps.
IMPORTANT
- Do not connect any other device's output to the camera's <HDMI OUT> terminal. Doing so may cause a malfunction.
- An HDMI cable (sold separately) is necessary to connect the camera to a High Definition TV set. The TV set must have an HDMI terminal as well.
- The camera does not have an audio/video OUT terminal. Therefore, the camera cannot be connected to a TV set with an analog AV cable.
- Before connecting or disconnecting the cable between the camera and TV set, turn off the camera and TV set.
NOTE
While the camera is connected to a High Definition TV set and the image is displayed there, nothing is displayed on the camera's LCD monitor.
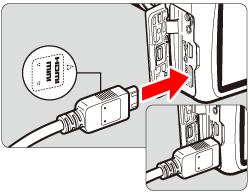
1. Connect the HDMI cable to the camera's <HDMI OUT> terminal.
Insert the plug with its <  HDMI MINI > logo facing the front of the camera.
 HDMI MINI > logo facing the front of the camera.
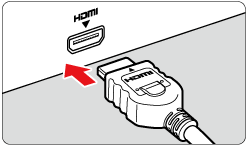
2. Connect the HDMI cable to the TV set's HDMI IN port.
3. Turn on the TV set and switch the TV set's video input to select the connected port.
4. Set the camera's power switch to <ON>.
5. Set the mode dial to <  >.
>.
 >.
>.The image will appear on the TV screen. (Nothing will be displayed on the camera's LCD monitor.)
6. Focus.
7. Press the <  > button to start shooting a movie.
 > button to start shooting a movie.
While the movie is being shot, the [  ] mark will be displayed on the upper right of the screen.
 ] mark will be displayed on the upper right of the screen.
Press the <  > button again to exit movie shooting.
 > button again to exit movie shooting.
NOTE
When connecting your camera to a TV set using a HDMI cable, keep the following points in mind.
- If you connect the camera to a TV set with an HDMI cable and shoot a movie at [1920x1080] or [1280x720], the movie being shot will be displayed in a small size on the TV set. The movie will still be recorded in the movie-recording size that was set.
- If you connect the camera to a TV set and shoot a movie, the TV set will not output any sound while shooting. However, the sound will be properly recorded.


