Solution
The EOS DIGITAL Solution Disk contains various software for EOS DIGITAL.
For details of the software, refer to the software instruction manual provided with the camera (which is included on the CD-ROM provided with the camera or can be downloaded from the website for the camera).
CAUTION
- Never connect the camera to your computer before you install the software.The software will not be installed correctly.Also, refer to the software instruction manual to make sure that your computer satisfies the software system requirements specified in the manual.
- Use the procedure below to install the software even when an older version of the software is installed.The installation will overwrite the previous installation, so you do not have to uninstall it manually.
- If an error occurs during installation, refer to the related information shown below.
IMPORTANT
With EOS DIGITAL Solution Disk Ver.25 or later, you can download and install additional software that is compatible with your camera model automatically over the Internet.
- To use this function, you need to be able to connect to the Internet (contract with a provider, installation of browser software, successful completion of various network connections).
- As with when you use the Internet in a standard way, connection fees or communication fees from your provider may apply depending on your environment.
How to install all the software included on the Solution Disk
1. Turn on your computer.
2. Insert the EOS DIGITAL Solution Disk (CD-ROM) into the computer.
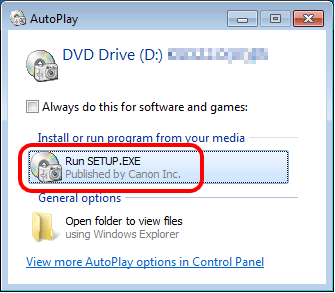
When the following screen is shown, click [Run SETUP.EXE].
Here, instructions are given using Windows 7 as an example.
- For Windows 8 or Windows 10, follow the installation instructions displayed on the screen after inserting the EOS DIGITAL Solution Disk into the computer.
- For Macintosh, double-click the CD-ROM icon displayed on the desktop to open it, and double-click [Canon EOS Digital Installer].
3. Select the area in which you live.
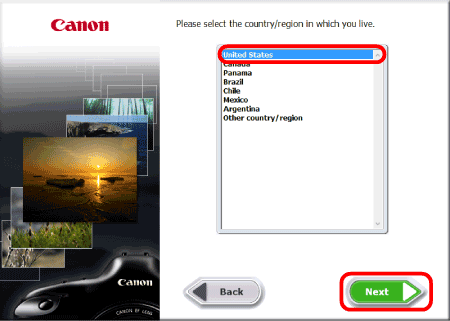
4. Select the country where you live, and then click [Next].
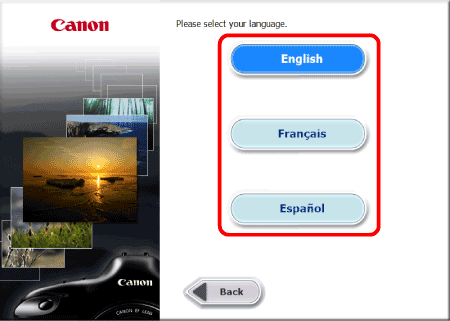
5. If a language setting screen appears, select the desired language from the options displayed.
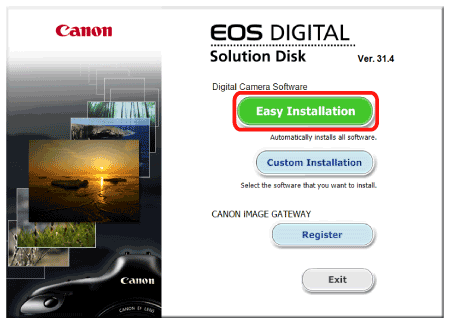
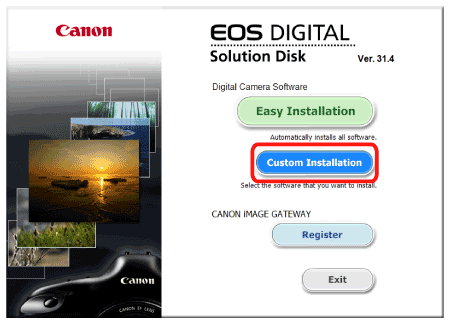
6. Click [Easy Installation] (to install all applications included on the Solution Disk).
To select the software to be installed, click [Custom Installation]. For details, refer to "How to install only the necessary software" below.
7. Close any other applications, and then click [OK].
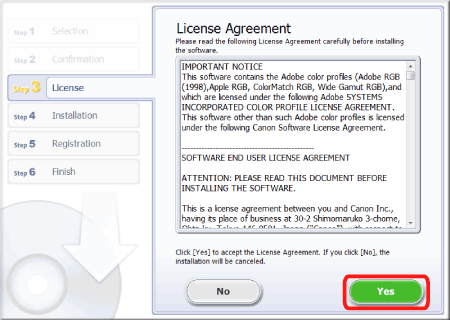
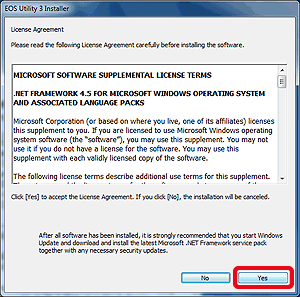
9. If you accept the license agreement, click [Yes].
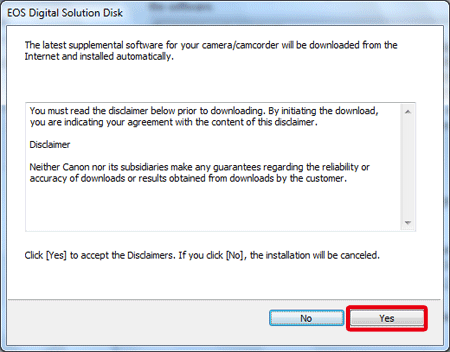
10. With EOS DIGITAL Solution Disk Ver.25 or later, when connected to the Internet, the following screen will appear.If you agree to the disclaimers, click [Yes].
IMPORTANT
- Depending on your device model, [User Account Control] may appear.In this case, click [Yes] to proceed to the next step.
- For Windows 7, [Microsoft .NET Framework 4.5] must have been installed for operation.If this software is not installed on your computer, [Microsoft .NET Framework 4.5 License Agreement] is displayed. Click [Yes] to continue the procedure.
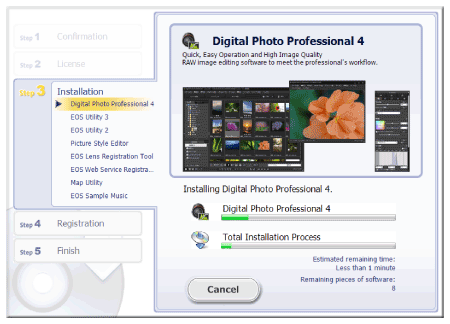
11. The following window appears, and installation starts.
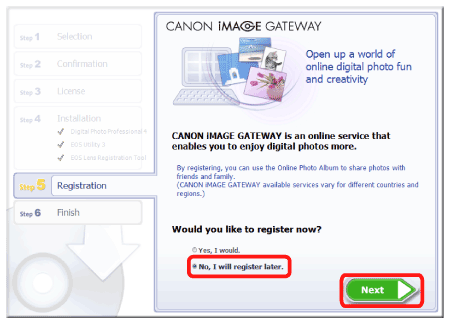
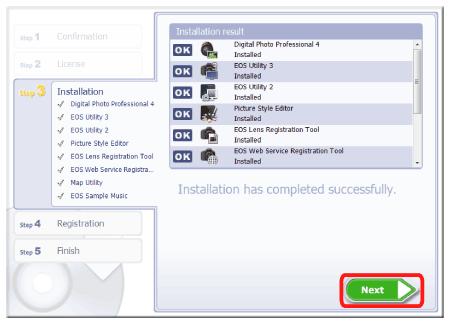
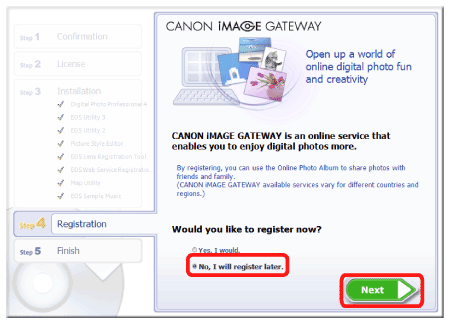
13. The following screen is displayed.Select [No, I will register later. ] here, and then click [Next].
To register your camera on CANON iMAGE GATEWAY, click [Yes, I would. ].
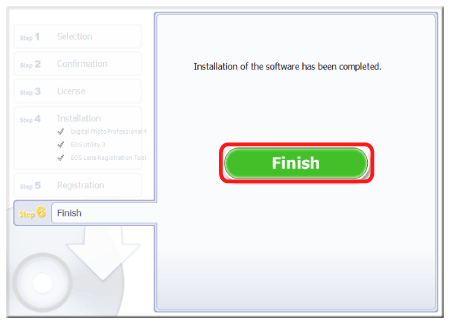
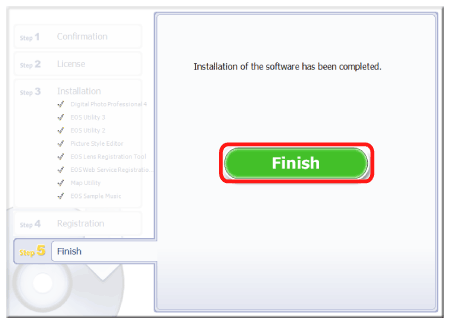
16. When you are prompted to restart the computer, click [Restart]. After the computer restarts, eject the CD-ROM.
This completes the steps for installing all the software included on the Solution Disk.
Note that to use EOS Utility, the camera and the computer must be connected before you start EOS Utility.For details on how to connect the camera and the computer, refer to the instruction manual provided with the camera.
How to install only the necessary software
Follow the steps below to install only the necessary software.
1. Turn on your computer.
2. Insert the EOS DIGITAL Solution Disk (CD-ROM) into the computer.
When the following screen is shown, click [Run SETUP.EXE].
Here, instructions are given using Windows 7 as an example.
- For Windows 8 or Windows 10, follow the installation instructions displayed on the screen after inserting the EOS DIGITAL Solution Disk into the computer.
- For Macintosh, double-click the CD-ROM icon displayed on the desktop to open it, and double-click [Canon EOS Digital Installer].
3. Select the area in which you live.
4. Select the country where you live, and then click [Next].
5. If a language setting screen appears, select the desired language from the options displayed.
6. When the following screen is shown, click [Custom Installation].
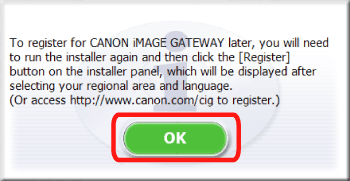
7. If the following figure is shown, click [OK].
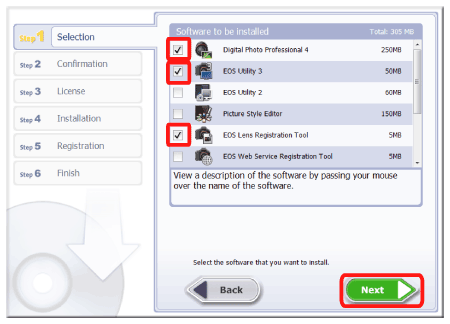
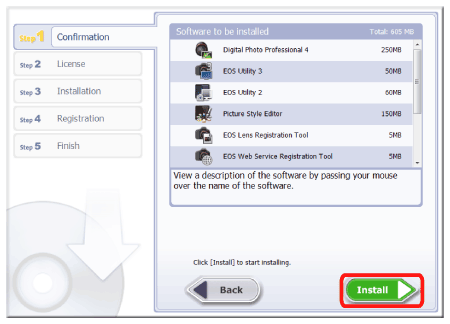
8. In the [Software to be installed] window, select only the software to be installed (

), and then click [Next].
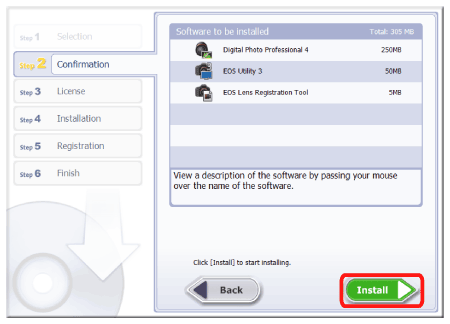
10. If you accept the license agreement, click [Yes].
11. With EOS DIGITAL Solution Disk Ver.25 or later, when connected to the Internet, the following screen may appear.If you agree to the disclaimers, click [Yes].
IMPORTANT
- Depending on your device model, [User Account Control] may appear.In this case, click [Yes] to proceed to the next step.
- For Windows 7, [Microsoft .NET Framework 4.5] must have been installed for operation. If this software is not installed on your computer, [Microsoft .NET Framework 4.5 License Agreement] is displayed. Click [Yes] to continue the procedure.
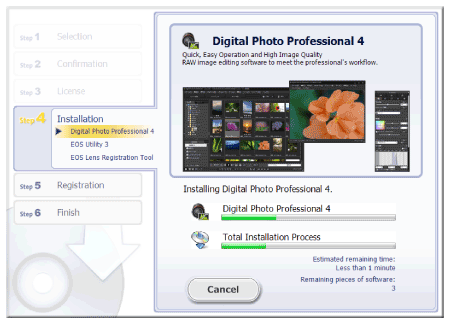
12. The following window appears, and installation starts.
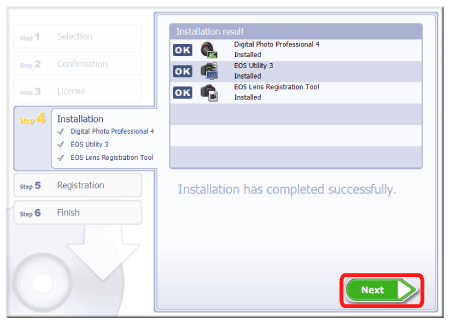
14. The following screen is displayed. Select [No, I will register later. ] here, and then click [Next].
To register your camera on CANON iMAGE GATEWAY, click [Yes, I would. ].
17. When you are prompted to restart the computer, click [Restart]. After the computer restarts, eject the CD-ROM.
This completes the steps for installing only the necessary software.
Note that to use EOS Utility, the camera and the computer must be connected before you start EOS Utility.For details on how to connect the camera and the computer, refer to the instruction manual provided with the camera.





 ), and then click [Next].