Solution
Whenever you set the power switch to <ON> or <OFF>, the Self Cleaning Sensor Unit is activated to automatically shake off the dust on the front of the sensor (CMOS). Normally, you need not pay attention to this operation. However, you can manually perform sensor cleaning as follows.
1. Set the power switch to < ON >.
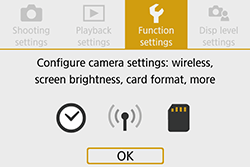
2. Press the <MENU> button to display the main tabs.
3. Press the <

> <

> keys of the cross keys to select the [

] tab, then press <

>.
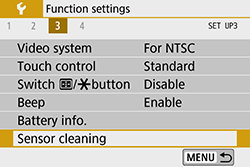
4. Under the [

] tab, select [Sensor cleaning] with the cross keys, then press <

>.
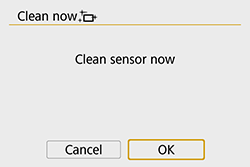
5. Select [Clean now

], then press <

>.
6. Select [OK], then press <

>.
The screen will indicate that the sensor is being cleaned. (A small sound may be heard.) Although there will be a mechanical sound of the shutter during the cleaning, no picture is taken.
NOTE
- For best results, perform the sensor cleaning with the camera placed upright and stable on a table or other flat surface.
- Even if you repeat the sensor cleaning, the result will not improve much. Immediately after the sensor cleaning is finished, the [Clean now
 ] option remains disabled temporarily.
If there is dirt or dust that cannot be removed by following the procedure above, please see the "Related Information" section below.
REFERENCE
- Normally, the Self Cleaning Sensor Unit will eliminate most of the dust that may be visible on captured images. However, for the case where visible dust still remains, you can append the Dust Delete Data to the image for erasing the dust spots later. The Dust Delete Data is used by Digital Photo Professional (EOS software) to erase the dust spots automatically.
- For details about dust delete data, refer to the instruction manuals. For Automatic Dust Erasure Processing using Dust Delete Data, refer to the Software Instruction Manual for Digital Photo Professional. Instruction manuals (PDF files) and software can be downloaded from the Canon Web site.

 > <
> <  > keys of the cross keys to select the [
  ] tab, then press <
  >.
>.
 ] tab, select [Sensor cleaning] with the cross keys, then press <
  >.
>.
 ], then press <
  >.
>.
 >.
>.
 ] option remains disabled temporarily.