28-Jan-2020
8204744300
 illustration, are steps for the iPad. procedures starting with a
  illustration, are steps for the camera.
 1. Install Camera Connect.
 2. Open [ Settings ] on iPad, make sure the [ Airplane Mode ] is [ OFF ].
 3. Turn the camera on.
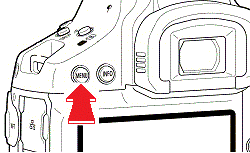
 4. Press the <
  > button.
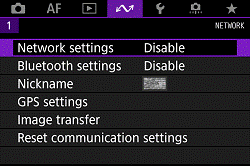
 5. Press the <
  > button to choose the [
  ] tab.
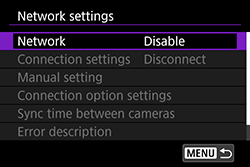
 6. Turn the <
  > dial to choose [ Network settings ], press <
  >.
>.
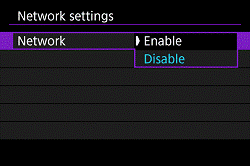
 7. Turn the <
  > dial to choose[ Network ], press <
  >.
>.
 8. Turn the <
  > dial to choose[ Enable ], press <
  >.
>.
 9. Turn the <
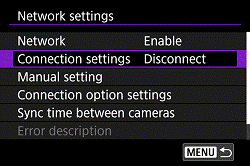
  > dial to choose [ Connection settings ], press <
  >.
>.
 10. Turn the <
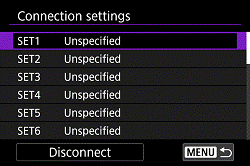
  > dial to choose[ SET* Unspecified ], press <
  >.
>.
 11. Turn the <
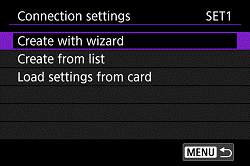
  > dial to choose [ Create with wizard ], press <
  >.
>.
 12. Turn the <
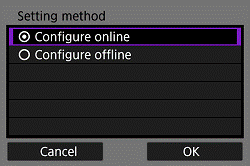
  > dial to choose [ Configure online ], Choose [ OK ] and press <
  >.
>.
 13. Turn the <
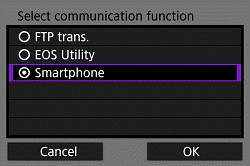
  > dial to choose [ Smartphone ], Choose [ OK ] and press <
  >.
>.
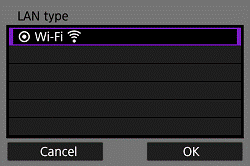
 14.Choose [ OK ] and press <
  >.
>.
 15. Turn the <
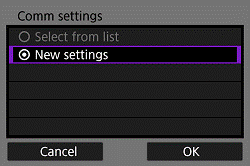
  > dial to choose [ New settings ], Choose [ OK ] and press <
  >.
>.
 16. Turn the <
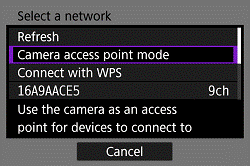
  > dial to choose [ Camera access point mode ], press <
  >.
>.
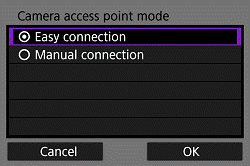
 17. Turn the <
  > dial to choose [ Easy connection ], Choose [ OK ] and press <
  >.
>.
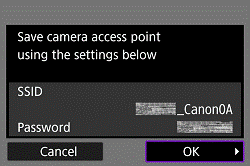
 18. Choose [ OK ] and press <
  >.
>.
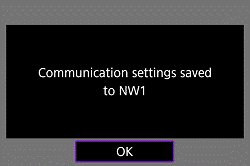
 19. Choose [ OK ] and press <
  >.
>.
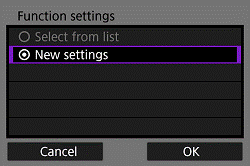
 20. Turn the <
  > dial to choose [ New settings ], Choose [ OK ] and press <
  >.
>.
 21. The SSID (
  ) and password (
  ) will be displayed on the screen.
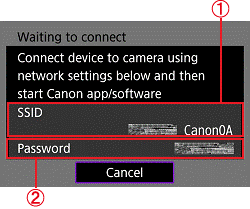
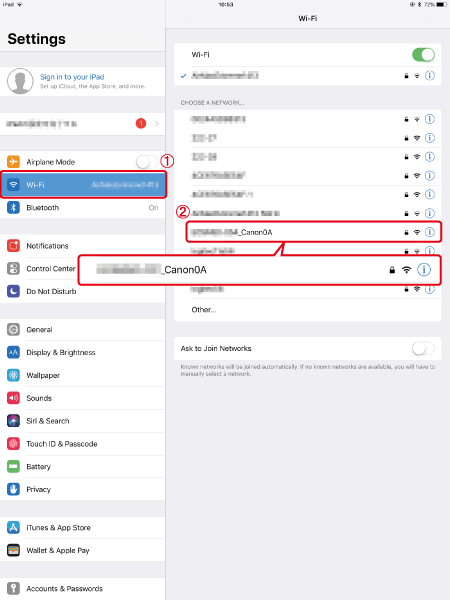
 22. Open [ Settings ] on the iPad, select [ Wi-Fi ] to confirm the SSID is the same as the one displayed on the camera screen, and tap to select.
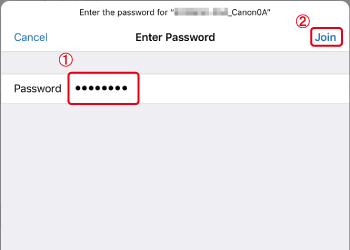
 23. Input the same Password as displayed on the camera (
  ) and tap [ Join ] (
  ).
).
 24. Open Digital Photo Professional Express.
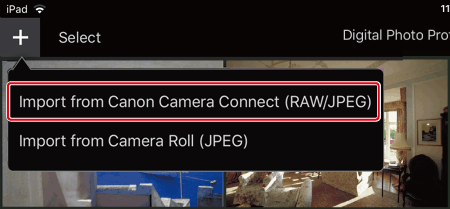
 25. Tap [Import from Canon Camera Connect (RAW/JPEG)] from [
  ] on the upper left hand.
 26. Tap [ OK ].
 27. Tap the camera to connect.
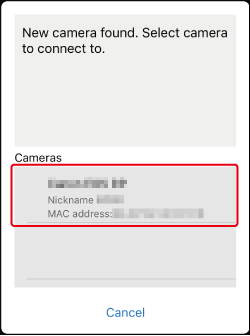
 28. Confirm that [ Operate the camera to establish a connection ] is displayed.
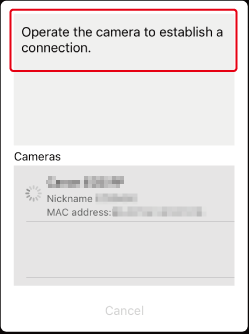
 29. Choose [ OK ] and press <
  >.
>.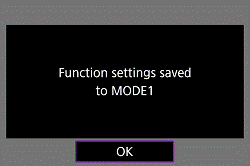
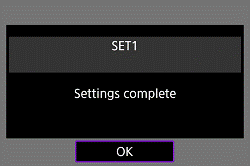
 30. Choose [ OK ] and press <
  >.
>.
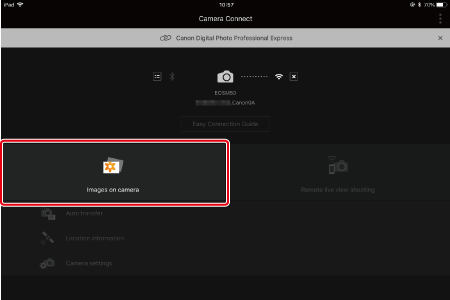
 31. Tap [ Images on camera ].
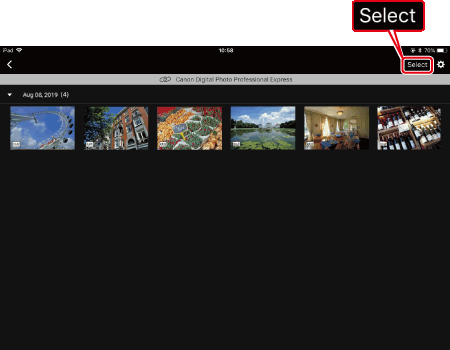
 32. Tap [ Select ].
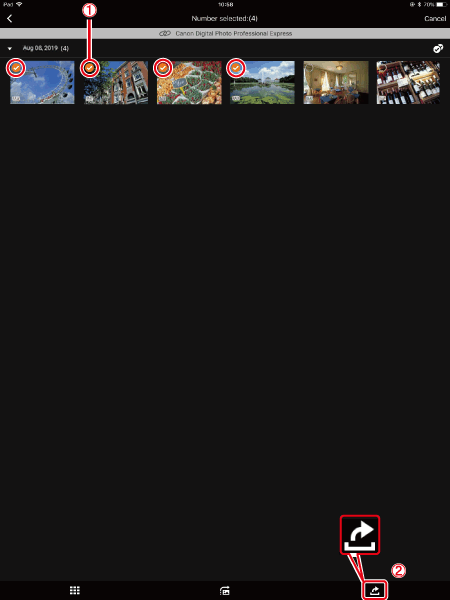
 33. Tap on the imported images to select images.
  displayed (
 ).
). ] to select all.
 (
( ).
).
 34. Select image size, and tap [ OK ].
 35. The selected images will be imported into Digital Photo Professional Express.
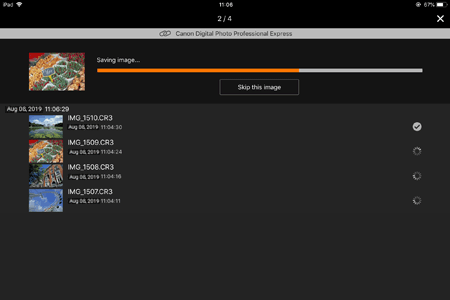
 36. Once the images have been imported, tap [ Open linked app ].
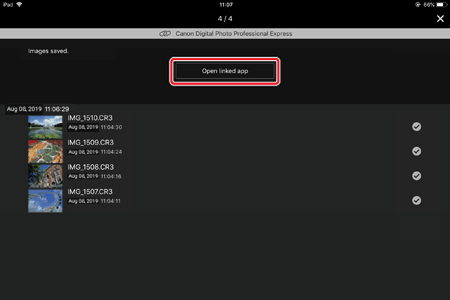
 37. Tap [ Yes ].
 38. Digital Photo Professional Express will open, tap [ OK ].
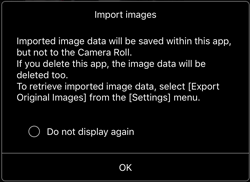
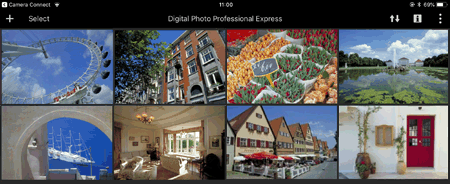
 39. The imported images will be displayed in the thumbnails screen in Digital Photo Professional Express.
 1. Install Camera Connect.
 2. Open [ Settings ] on iPad, make sure the [ Airplane Mode ] is [ OFF ].
 3. Turn the camera on.
 4. Press the <
  > button.
 5. Press the <
  > button to choose the [
  ] tab.
 6. Turn the <
  > dial to choose [ Network settings ], press <
  >.
>.
 7. Turn the <
  > dial to choose[ Network ], press <
  >.
>.
 8. Turn the <
  > dial to choose[ Enable ], press <
  >.
>.
 9. Turn the <
  > dial to choose [ Connection settings ], press <
  >.
>.
 10. Turn the <
  > dial to choose[ SET* Unspecified ], press <
  >.
>.
 11. Turn the <
  > dial to choose [ Create with wizard ], press <
  >.
>.
 12. Turn the <
  > dial to choose [ Configure online ], Choose [ OK ] and press <
  >.
>.
 13. Turn the <
  > dial to choose [ Smartphone ], Choose [ OK ] and press <
  >.
>.
 14.Choose [ OK ] and press <
  >.
>.
 15. Turn the <
  > dial to choose [ New settings ], Choose [ OK ] and press <
  >.
>.
 16. Turn the <
  > dial to choose [ Camera access point mode ], press <
  >.
>.
 17. Turn the <
  > dial to choose [ Easy connection ], Choose [ OK ] and press <
  >.
>.
 18. Choose [ OK ] and press <
  >.
>.
 19. Choose [ OK ] and press <
  >.
>.
 20. Turn the <
  > dial to choose [ New settings ], Choose [ OK ] and press <
  >.
>.
 21. The SSID (
  ) and password (
  ) will be displayed on the screen.
 22. Open [ Settings ] on the iPad, select [ Wi-Fi ] to confirm the SSID is the same as the one displayed on the camera screen, and tap to select.
 23. Input the same Password as displayed on the camera (
  ) and tap [ Join ] (
  ).
).
 24. Go to home screen, and open Camera Connect.
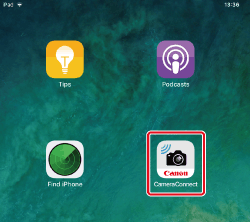
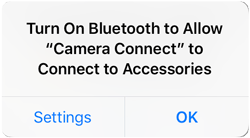
 25. Tap the camera to connect.
 26. Confirm that [ Operate the camera to establish a connection ] is displayed.
 27. Select [ OK ] and press <
  >.
>.
 28.press <
  >.
>.
 29. Tap [ Images on camera ] .
 30. Tap [ Select ].
 31. Tap on the imported images to select images.
 displayed (
  ).
). ] to select all.
  (
( ).
).
 32. Tap [Digital Photo Professional Express], to choose and tap [ Select ].
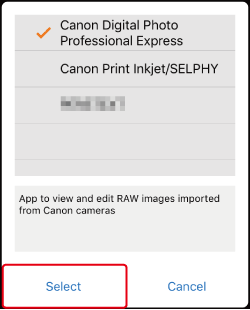
 33. Select image size, and tap [ OK ].
 34. The selected images will be imported into Digital Photo Professional Express.
 35. Once the images have been imported, tap [ Open linked app ].
 36. Tap [ Yes ].
 37. Digital Photo Professional Express will open, tap [ OK ].
 38. The imported images will be displayed in the thumbnails screen in Digital Photo Professional Express.
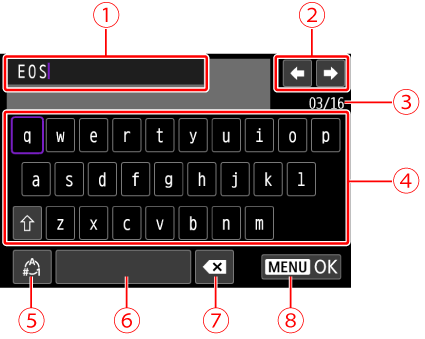
 | Input area, for entering text |  | Switch input modes |
 | Cursor keys, for moving in the input area |  | Space |
 | Current no. of characters/no. available |  | Delete a character in the input area |
 | Keyboard |  | Finish the text entry |
 > or the <
  > or <
  > dial to move within
  and
and  -
- 
 > to confirm input or when switching input modes.