Downloading Images to Your Computer
Downloading Images to Your Computer
Downloading images to a computer using CameraWindow
|
Note:
|
||
|
|
-
|
ZoomBrowser EX from the supplied Solution Disk must be installed on your computer for this operation.
|
|
|
-
|
Operations for Windows Vista are explained here. Images displayed or operation might differ slightly in Windows XP and Windows 2000.
|
|
|
-
|
As the actual locations of buttons/switches on cameras vary depending on the camera model, the illustrations that appear on this page may differ from your camera.
|
|
|
-
|
Some of the images that appear on this page contain a specific camera model name, however the actual model name varies depending on the camera used.
|
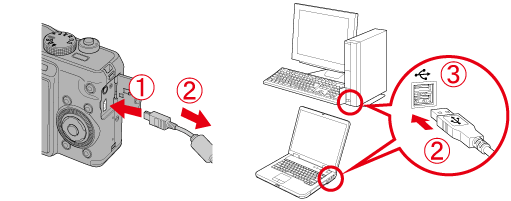
1. Connect the camera's DIGITAL terminal to the computer's USB port using the interface cable supplied with your camera.
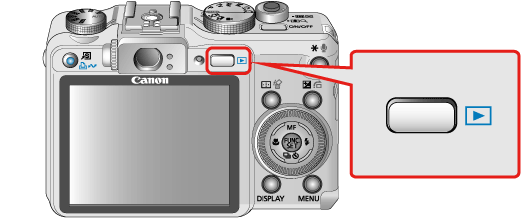
2. Press the camera's Playback  button.
3. The following window appears.
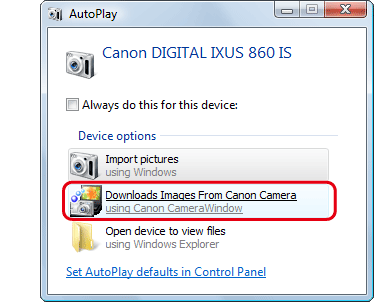
Click [Downloads Images From Canon Camera].
4. The [Camera Window] startup screen will appear.
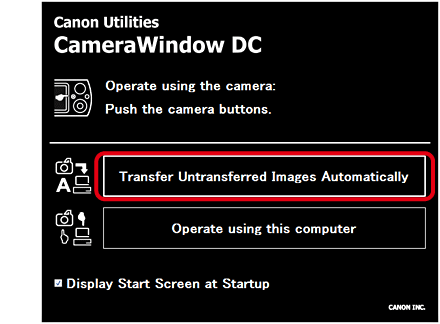
To import the image selected or to use save as, click [Operate using this computer] (images are generally stored in the [My Pictures] folder).
5. Click [OK].
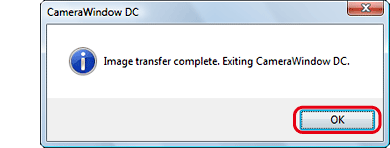
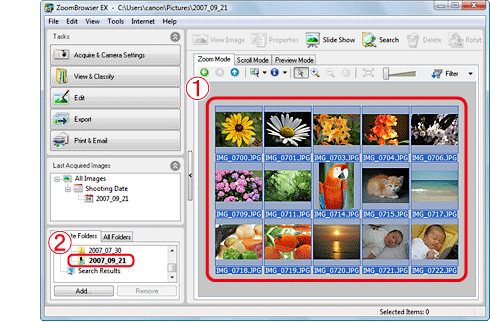
6. When downloading is complete, ZoomBrowser EX starts automatically.
The downloaded images will be stored in folders named for each shooting date, and will be displayed in the main window of ZoomBrowser EX.
The downloaded images will be stored in folders named for each shooting date, and will be displayed in the main window of ZoomBrowser EX.
If it is not possible to download images using this process, please see the following related information.


