Paper Jams
Solution
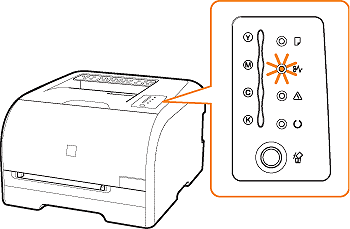
If a paper jam occurs during printing, the  (Paper Jam) indicator (orange) blinks, and the following messages appear in the Printer Status Window.
 (Paper Jam) indicator (orange) blinks, and the following messages appear in the Printer Status Window.
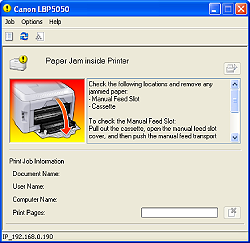
The messages displayed in the Printer Status Window indicate where the paper is jammed, and there are the following kinds.
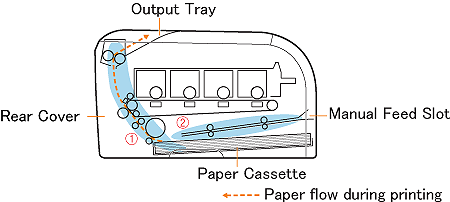
| Paper Jam Area | Message | |
| 1 | Paper cassette | <Cassette> |
| 2 | Manual feed slot | <Manual Feed Slot> |
1. Open the rear cover.
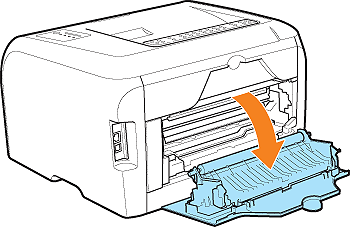
Even if you can see the paper here, do not remove it but proceed to Step 2.
2. Pull out the paper cassette.
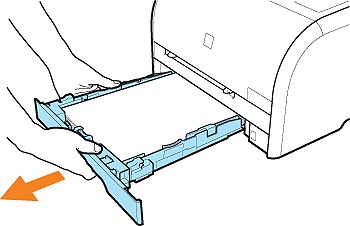
3. Remove any jammed paper by pulling it in the direction of the arrow.
 If you can see the rear edge of the jammed paper
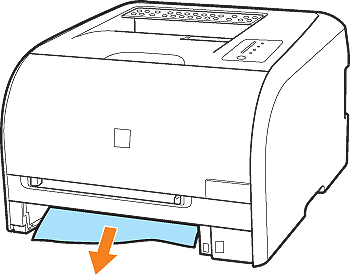
IMPORTANT
If the jammed paper cannot be removed easily, do not try to remove it forcefully but remove it from the rear cover.
If you remove the jammed paper forcefully, the feed rollers may come off.
 If you can see the top edge of the jammed paper
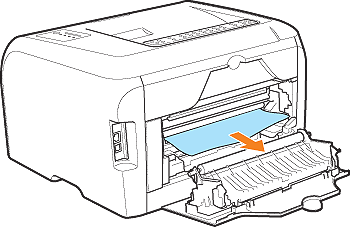
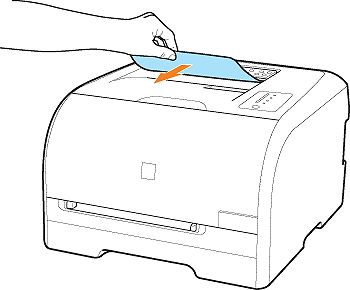
 If the top edge of the paper is output
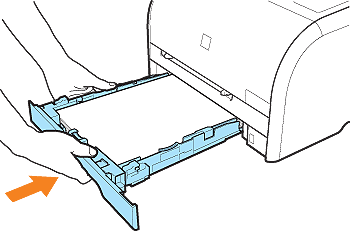
4. Set the paper cassette in the printer.
Push the paper cassette into the printer firmly.
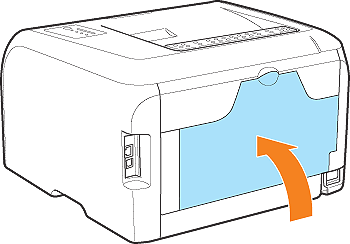
5. Close the rear cover.
6. Open and close the front cover.
The error message disappears by opening and closing the front cover, and the printer is ready to print.
1. Pull out the paper cassette.

2. Open the manual feed slot cover.
Holding the opening at the right of the manual feed slot cover, open it.
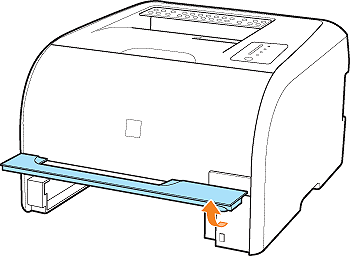
3. Open the manual transfer guide.
Holding the green tab, push the manual transfer guide downward.
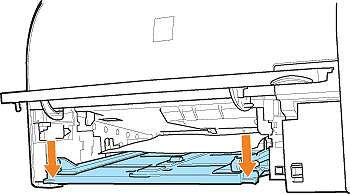
4. Remove any jammed paper by pulling it in the direction of the arrow.
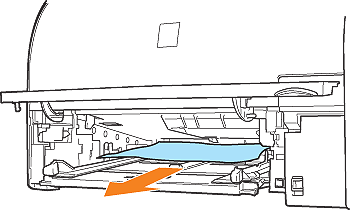
IMPORTANT
If the jammed paper cannot be removed easily, do not try to remove it forcefully but remove it by opening the rear cover.
For details on the procedure for removing jammed paper by opening the rear cover, see the procedure for "If Paper Is Jammed in the Paper Cassette".
5. Close the manual transfer guide.
Holding the green tab, close both sides of the manual transfer guide securely.
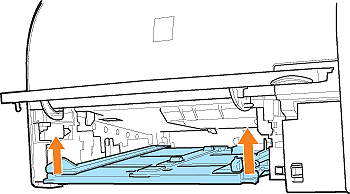
6. Close the manual feed slot cover.
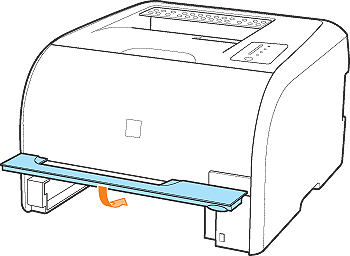
7. Set the paper cassette in the printer.
Push the paper cassette into the printer firmly.

8. Open and close the front cover.
The error message disappears by opening and closing the front cover, and the printer is ready to print.
IMPORTANT
- Remove jammed paper while the power of the printer is ON. If the power is turned OFF, the data being printed will be deleted.
- Applying excess force may result in tearing paper or damaging the parts in the printer. When removing jammed paper, pull out the paper in the most appropriate direction, judging from the position of the paper.
- If paper is torn, be sure to find and remove any remaining pieces of paper.
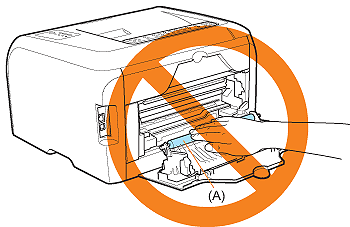
- Do not touch the feed rollers. This may result in damage to the printer or a printer error.
- Do not touch the transfer roller (A), as this may result in deterioration in print quality.
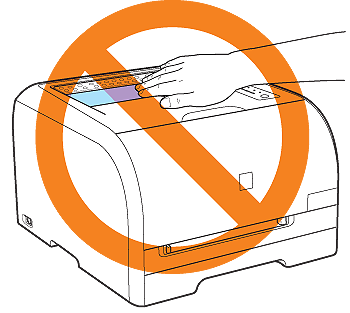
- The output tray and its surroundings become hot during or immediately after using the printer. Do not touch the output tray and its surroundings when removing the jammed paper or performing the related operation.
- Be sure to check if the manual transfer guide is closed completely. If the manual transfer guide is not closed completely, this may result in misfeeds or paper jams.

