Compatible Remote Switch (EOS M)
Solution
You can use Timer Remote Controller RC-6 to the camera and shoot with it.

NOTE
- For details on these accessories' operation procedures, see the respective instruction manuals.
- In addition to the accessories above, you can use Remote Controller RC-1/RC-5 (sold separately). It can also be used when shooting movies. However, the RC-5 cannot be used to take still images in the Movie shooting mode.

Remote controller RC-6 (Sold separately) enables you to take pictures wirelessly up to about 5 meters/16.4 feet from the camera. You can either shoot immediately or use a 2-sec. delay.
1. Set the power to <ON>.
2. Press <  /
/ >(Drive mode selection button) when the camera is ready to shoot.
 /
/ >(Drive mode selection button) when the camera is ready to shoot.
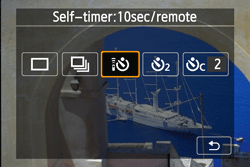
3. select [  ](Self-timer: 10sec./remote), and then press the <
 /SET> button.
 ](Self-timer: 10sec./remote), and then press the <
 /SET> button.
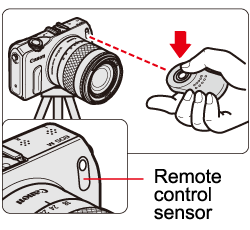
4. Point the remote controller toward the camera's remote control sensor and press the transmit button.
5. The camera will autofocus. When focus is achieved, the self-timer lamp will light and the picture will be taken.
CAUTION
Fluorescent or LED lighting may cause camera misoperation by triggering the shutter inadvertently. Try to keep the camera away from such light sources.
NOTE
When shooting movies
Start and stop move shooting using the Remote Controller RC-6 (sold separately).
If you set the shooting timing switch to the <2> position and press the transmit button, movie shooting will start. If the switch is set to <  > (immediate shooting), still photo shooting will take effect.
 > (immediate shooting), still photo shooting will take effect.


