
Setting / Canceling the Self-Timer
Solution
When using the [Self-Timer], you can set a 10-second or 2-second delay for shooting after the shutter button is pressed. This section describes how to set and cancel the [Self-Timer].
CAUTION
- Screens or menu listings may differ depending on the camera model being used.
- As the actual locations of buttons / switches on cameras vary depending on the camera model, the illustrations that appear on this page may differ from your camera.
- The following explanations are provided based on the assumption that the [Shooting Mode] is set to [Program AE] (
 ).
).
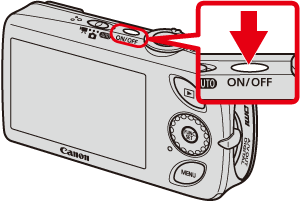
1. Press the <Power> button on the camera.
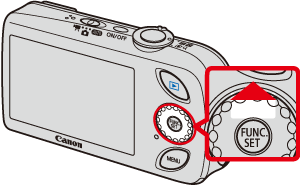
2. Press the up <directional button> ([Self-Timer]).
3. The following screen appears.
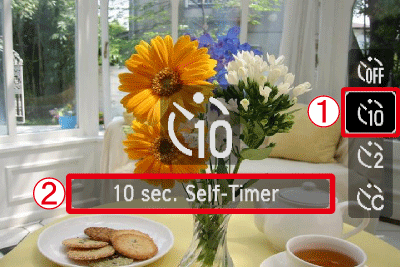
 Operate the <directional buttons> to select [10 sec. Self-Timer] (
 ) or [2 sec. Self-Timer] (
 ).
). Confirm that the [Self-Timer] setting you selected appears.
4. If the following icon appears on the LCD monitor, this setting is completed.

5. Press the <Self-Timer> ( ) button, and the following screen appears.
) button, and the following screen appears.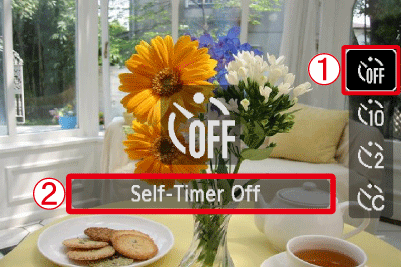 Operate the <directional buttons> to select the [Self-Timer Off] (
 ). Make sure to select [Self-Timer Off].
6. If the self-timer icon is not displayed, then the [Self-Timer] setting has been cancelled.
This completes the process of setting the self-timer.
If you want to make an optional time setting in [Self-Timer], please see the following section.